MODx Revolution for Complete Beginners Part 2 – Installation
 Welcome to Part 2 of the MODx Revolution for complete beginners series. In the last post, I briefly introduced this series. In this installment, we’re going to get hands on by going through the process of installing MODx Revolution so that we can start building our site. The process of installing Revolution is pretty straightforward, and as long as you have ensured that your server meets the installation requirements, you should have no problems proceeding with the install smoothly. Should you run into problems, the MODx Revolution documentation covers some common problems that should give you a good starting point for troubleshooting your install.
So far:
Part 1: Introduction to MODx Revolution
There are three ways to install MODx Revolution – Basic, Advanced, and from Git. For this tutorial we’re going to do the basic installation, which is more than sufficient. But if you want to geek out go ahead and check the other options out, see link at end of post.
Throughout this series we are going to be building a MODx Revolution resource website and we will use it as a place to test out different snippets and gather information about MODx and all that good jazz. As always, I will use a lot of screenshots as I go so that even if you’re not following these tutorials as I create them and my links look nothing like your evolving website, you can still compare your website with my screenshots.
1. Download MODx and Upload to Server
We’ll start out by downloading the MODx install archive file which is found at http://modx.com/software/open-source-cms/modx-revolution/. At the time of this writing the most recent version is 2.0.0 pl (EDIT: This tutorial series has now been updated to cover 2.2.0 pl2 – February 8, 2012). You can either download the normal package or the advanced package. I will be working with the normal package. We will then upload these files to our hosting environment. There are two ways to do this:
- Unzip the files and upload them using FTP
- Upload the zip file itself and unarchive it directly on your server.
I prefer the second option since it works faster.
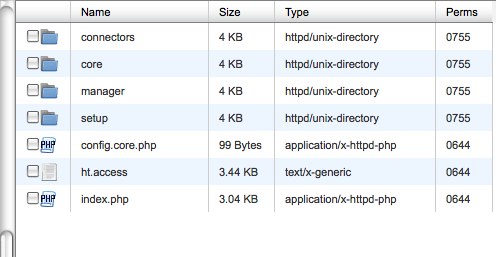
Once you have the files uploaded, your directory structure should look something like the following:
You can read more about the MODx directory structure in the official manual, see link at end of post.
2. Create the Database and Database User
Our files are now uploaded and ready to go. The next step is to create a database and database user. How you do this will vary depending on your hosting environment and what control panel and tools are provided for you. If you’re unsure of how to proceed, check with your host or search google for information specific to your setup. If you’re using Wampserver, you can look at https://codingpad.maryspad.com/2009/11/14/creating-projects-databases-users/.
- Ensure that the user you assign to your newly created database has all privileges on the database.
- Note the name of the database and user and user password as you will need these on the next step
- Some hosts prefix the names of databases and/or users with a name specific to your account, so make sure you make note of this.
- If you don’t have the option to do so while creating your database, it’s a good idea before proceeding with the install to check your database character set and collation and set them to utf8 and utf_general_ci respectively (you can do this using phpmyadmin or whichever database admin tool your host provides). I have found that the server I am currently hosting on defaults to the utf8 character set but whenever I create a database the collation is set to latin_swedish, so it pays to check and rectify any mismatches. More about character sets and collation at the end of the post.
3. Install MODx Revolution
Once you have the files uploaded and your database and database user ready, it’s time to proceed with the install. In your browser, navigate to the setup folder in the location where you uploaded the MODx files by appending /setup to your site url.
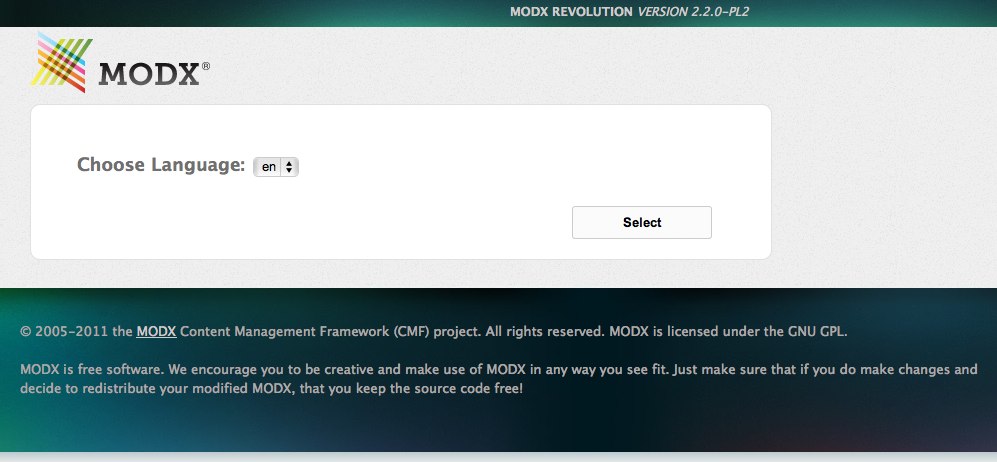
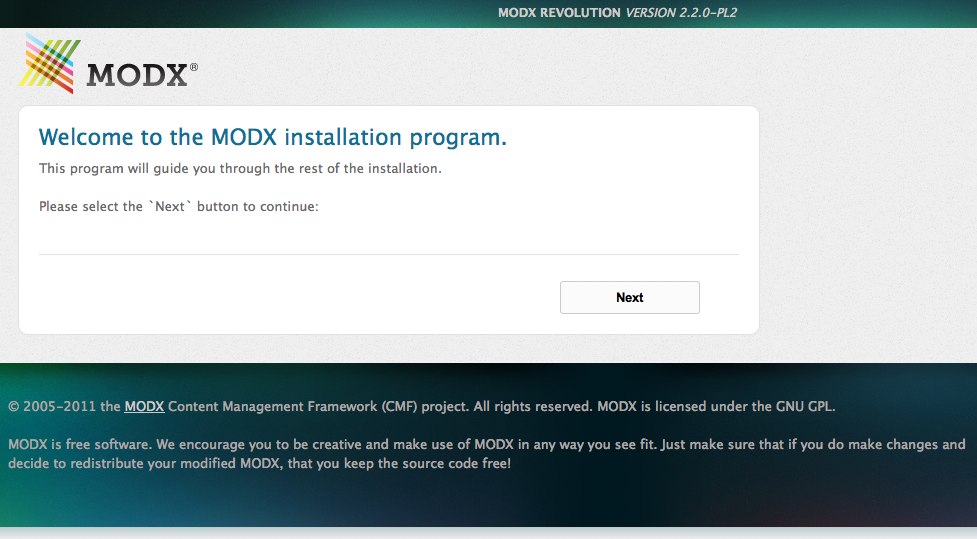
You will then be presented with the first screen initiating the installation process:
3.1 Select Language
Select your language from the dropdown list and click on Setup to proceed to the next step.
3.2 Select Installation Type
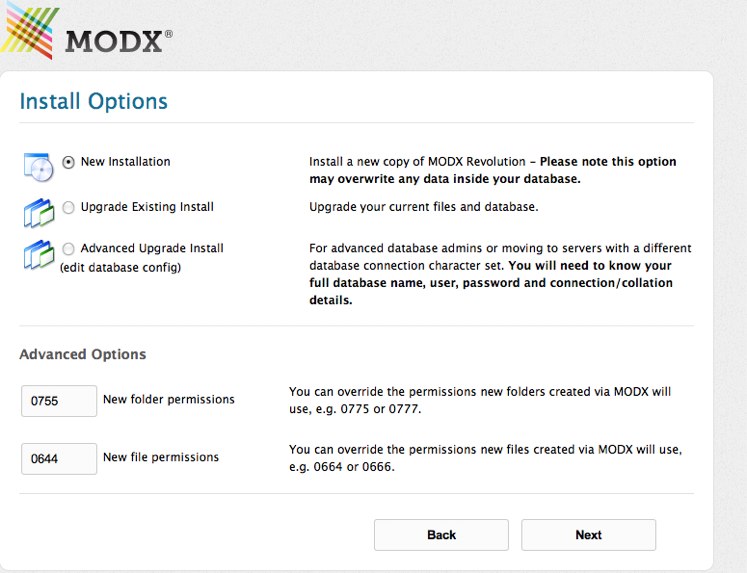
At this stage we have the option to select what kind of install we want. Since this is a new website we’ll go with the New Installation option. If we were upgrading from a previous version of Revolution then we would use one of the Upgrade options. If you need to, you can modify the folder permission settings in the Advanced Options section, but for most environments the default settings should work fine.
3.3 Connecting to the Database Server and Detecting Collations
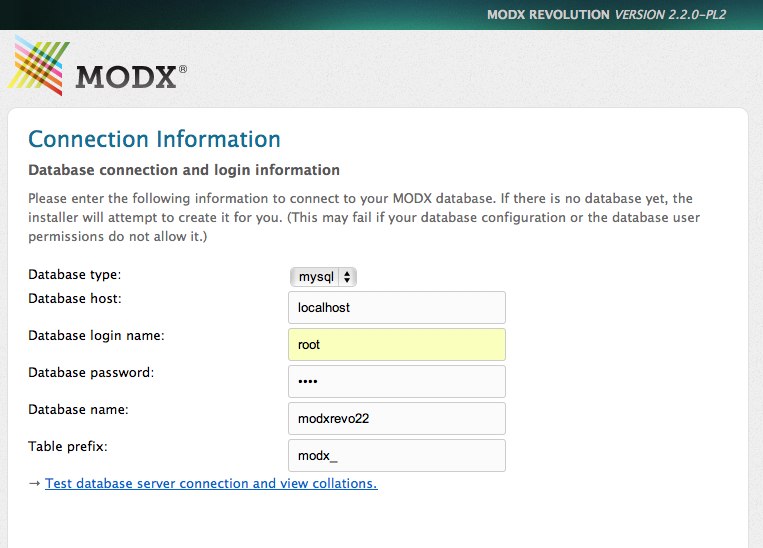
In the next step, MODx now needs to connect to the database we created.
- The first field, Database type, refers to the type of database you have. In most cases this will be mysql, but make sure you select the correct option based on what your server supports.
- The second field, Database host, will usually default to localhost, and in most cases you don’t need to change that, unless your hosting company has it set up differently.
- In the Database login field, enter the name of your database user that you created, and remember to add a prefix if your host adds one, as mentioned before
- Then enter the password you gave the user in the Database password field.
- The name of the database you created goes in the Database name field, and remember again to add the prefix if there is one.
- Finally, there is the Table prefix field, which by default is set to modx_. You can change this if you wish to, but usually there is no need to.
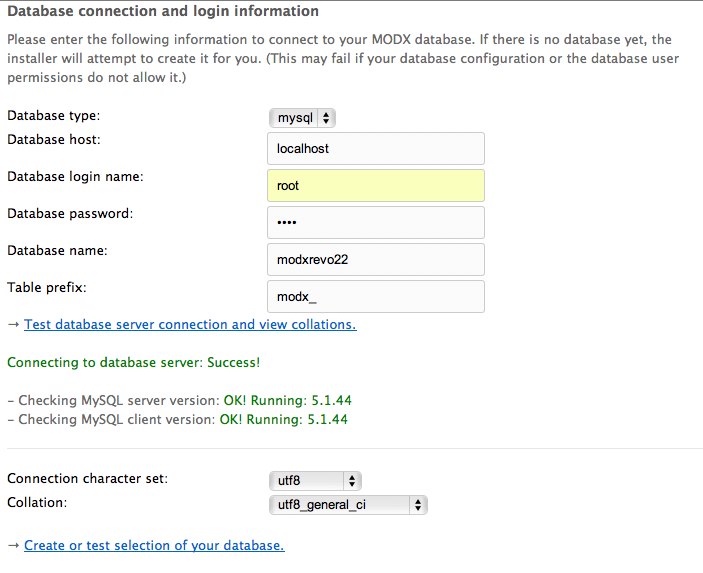
Once you click on “Test database server connection and view collations”, the MODx installer will attempt to connect to your database and detect the database collations. If all is set correctly, you should then get a success message that indicates that connection to the database server was successful and collations were set.
The installer now needs to test the selection of the database we created. You notice that the installer can also create the database for you, but not all servers will allow this, so I generally prefer to create the database beforehand and simply select it at this stage. If we click on the “Create or test selection of your database” we get a success message indicating that our database was successfully found, and we can now create our main admin user and proceed with the installation.
NB: This is one of the points at which most installs seem to hit a snag. I’ve found that the best way to avoid getting stuck at this point is to ensure that you create your database with the correct character set and collation, and to ensure your server meets the recommended requirements for running Revolution.
3.4 Creating Admin User
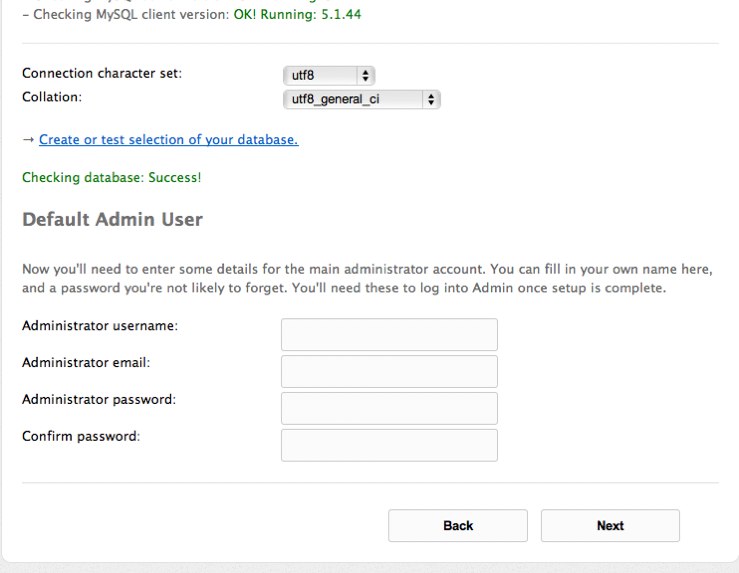
This step is pretty straightforward and self-explanatory. Here you create your default admin user account, the one you will use to log into the site to start your sitebuild. Make sure that you remember the username and password you enter here as you will need them later on 🙂
3.5 Pre Installation Tests and Installation
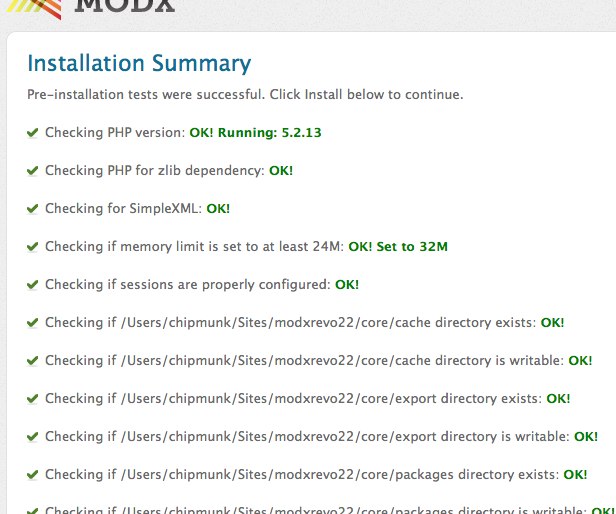
Once you enter the user information, clicking Next initiates the Pre-Installation tests. In this step the MODx installer checks to make sure your server is set up correctly for Revolution to run. If all is good, you should get green check marks on every item on the summary page, indicating that you’re ready to go. If there are any issues, they will be marked in red and you need to rectify them before you can proceed.
The more common snags have to do with the MySQL server version, folder permissions, and memory settings. Check with your hosting company to see if these can be rectified. Checking the MODx community forums may also yield workarounds and solutions to your specific server issues.
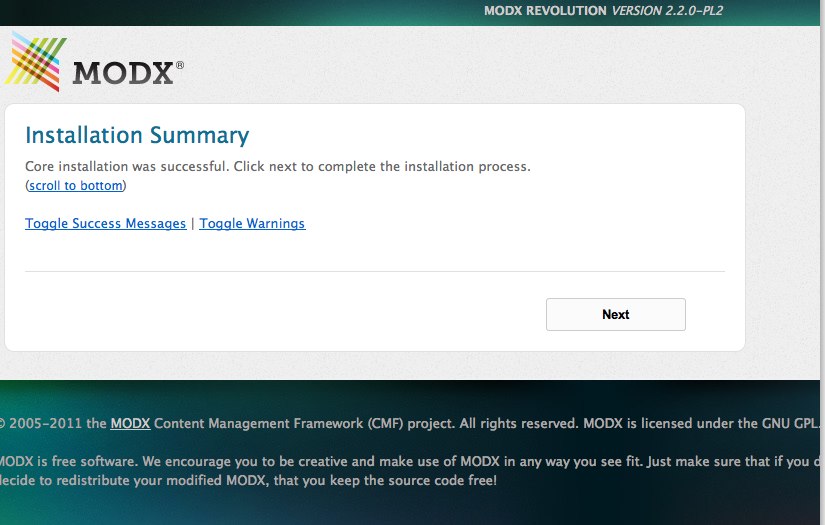
Assuming that everything checks out fine, we can now scroll down the page and click the “Install” button. The install should continue successfully and we get the message that the Core has installed. You can click the Toggle links to see the success message and warnings (if any).
We then click Next to proceed to the next step to finalize the install.
3.6 Completing the Installation
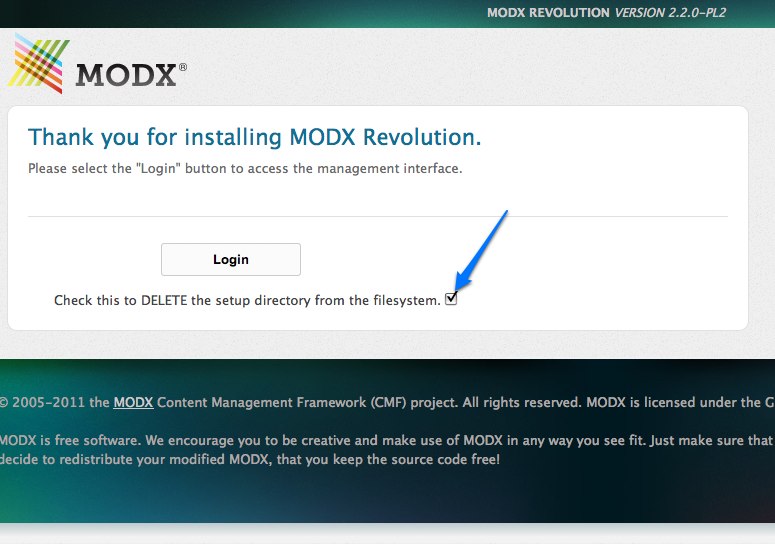
This final stage reminds us to delete the Setup folder. It is strongly recommended that you do this for security reasons, as you don’t want anyone attempting to run the install again on your site. If you check this box the installer will delete the setup folder from your system.
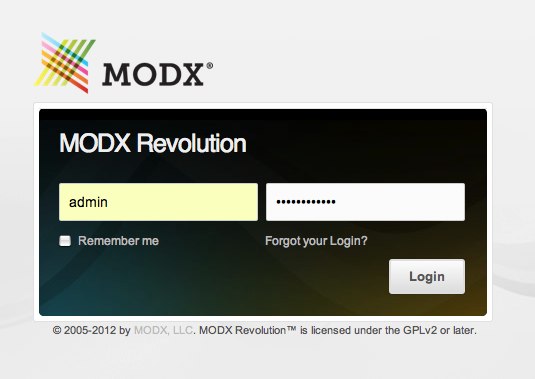
Once you check this box, click on Login, and the files will be deleted from your server and you’ll be taken to the your site’s login screen.
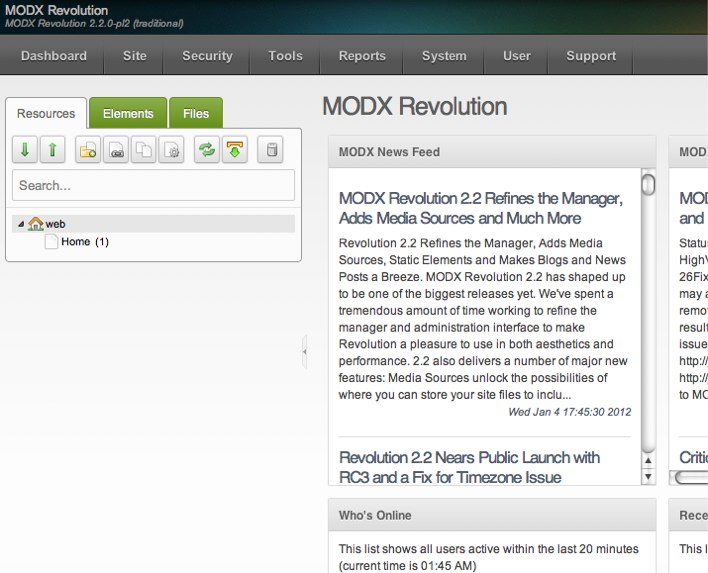
Ah, sweet success :). You can now log into your site manager using the administrator information that you created in step 3.4. The manager backend opens up with a Welcome screen with some helpful information, and if you close that you then have access to the MODx Revolution manager (partial view below):
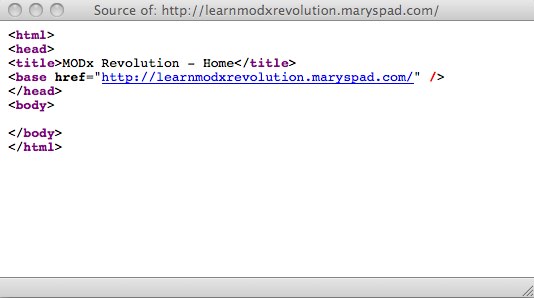
If you navigate to the front view of your website you will find a blank page. And if you right-click anywhere on the page to view source, you notice that there’s really nothing much there. My source simply looks like this:
As you can see, MODx Revolution gives us basically a blank slate to start with, which is great because there are no constraints as to what our design or layout can be, among other things.
Notes for MODx Evolution Users
If you’re coming from Evolution, you’ll notice a couple of things:
- There is no option to install a Sample site. You can however get this from the repository using Package management
- Similarly, there is no default template installed
- There are no default snippets, chunks, modules, or plugins.
We will be grabbing all these via Package Management and adding them as needed.
In the next installment, we will do some basic site configuration, add some content, and briefly explore the manager as we start to build out our site, so stay tuned, subscribe to the feed, and leave comments with questions, suggestions, corrections, or just to say hey! 🙂
More Reading:
MODx Revolution Installation – http://rtfm.modx.com/display/revolution20/Installation
Explanation of MODx Revolution Directory Structure – http://rtfm.modx.com/display/revolution20/Explanation+of+Directory+Structure
Database Character sets and collation – http://dev.mysql.com/doc/refman/5.0/en/charset-database.html
Go to Part 3: MODX Revolution Basic Configuration and Installing Extras


Great tutorial, I will definitely follow this series!
Thx
Cool…looking forward to more.
Great, a series on Revolution! I’ve come to this point previous month. Installing and getting GetResources and Wayfinder loaded wasn’t too difficult. But the ‘basically blank slate’ left me a blank mind. Where to start? I’m eagerly awaiting the next parts.
Great Start Mary.
Just to say there is a Basic Template.
Produces source you show.
Just no content in Home Resource.
I think it should say at least “Success”.
Keep up the work.
Regards
Allan
allanb
Thanks for the feedback. Yes, there is a Basic template, and I’m going to get to that in the next installment when I talk about working with templates.
cheers
mary
Thank so much for your crystal clear explanations. I was ready to rock in 10 minutes. Awesome!
I’m used to Drupal 6, which I use most of the time and what I like about Modx is that it comes with an absolutely blank slate and not with a bloated markup and tons of CSS files that I don’t need.
It’s kind of refreshing and a creativity booster for me.
-Thierry
Thierry
Thanks for your feedback. I use both Drupal and MODx and love both for different reasons. But yes, MODx does give you a lot of freedom! 🙂
mary
HI Mary
Great to see these tutorials thanks allot, I have just downloaded MODx Revolution 2.0.2. I want to upgrade my website http://www.funusbdrive.com/ which is created in modx 1.0.2…. I have made a back up of all my files.
I am a bit worried about the menu working the same after the install and if all my content on the pages might be lost.
Do you have any suggestions before I go ahead any advise would be useful.
Michael
Apologies again for the delayed reply. If you have your backup ready and tested, then you should be fine to roll back if anything goes wrong. I personally haven’t done any Evo to Revo upgrades so I don’t have any specific recommendations apart from making sure you have a working backup.
Did you do the upgrade, and did it work out okay for you?
mary
Hi Mary
Just a quick question: should you remove “delete” the setup/ folder after the install? I keep getting
One or more configuration details didn’t check out OK:
Configuration warning: Installer still present
I deleted the setup/ folder
Michael
Sorry for the delayed reply. Yes, it is an important security measure to delete the setup folder when the installation is done.
mary
hi Mary
I found your installation guide very useful and handy to anyone trying MODx
what would be your suggestion for moving from localhost to a live server? Should I follow “Moving Your Site to A New Server” guideline found on MODX revo original documentation page, then re-run setup at the end?
Imre
I haven’t worked through the steps in the documentation yet but I expect that they should work just fine.
mary
He i hav problem with my database connection
Icreate a duplicate database with original one & rename it but bcoz of this my admin panel gives the error
That account could not be located. Check the username and re-type the password to try again.
But if i use original one its work properly
Please please any one help me out
PLEASE
dice
what exactly are you trying to do? Why are you creating a duplicate database? I don’t entirely understand your question.
mary
My old site is in staging folder .The client wants same site in production folder.So i copy all folders from staging & move into production. also And he want to use differnt database for both.So i create new database same as previous one for new production site but its not working but if I use old database its work properly
Are the sites on the same server?
Did you edit the config file for the new site to reflect the name of the new database?
Thanks for reply mary,
Yes I done all the changes related to config.inc.php & .htaccess.Becase I had done this task my previous project also,But that have old virsion of modx 1.0.4.
I use the MODx Revolution 2.0.4-pl2.
Hi,
Great tutorials for a noob (to Modx) like me:)
I’m trying to install Modx on a fresh Ubuntu server with all the LAMP pieces installed. Setup starts without issue.
When I am taken to the Connection Information page, the database checks out with no problem. Strangely enough, the dropdowns for Connection character set and Collation are empty. I’ve set these to utf8-bin in PHPMyAdmin and even created an empty modx database to which root has full permission.
How do I resolve the issue with the blank char set and collation?
Is this the root cause of my setup issue? Are there other things to check out?
Thanks,
Sid
Sid
I’m not sure what could be causing this behavior. It may make sense to start afresh and download a fresh copy of MODX and try to install again. Sometime a corrupted download can cause all sorts of strange issues.
mary
Hi Mary, will definitely be following this series in addition to the official documentation. Are you “really” saying that via this tutorial we’ll build http://learnmodxrevolution.maryspad.com/index.html?
If so that’s pretty awesome. Can’t wait to get started tonight, coffee in hand.
Andrew,
thanks for the comment. Yes, the tutorials go step by step to describe building that site, to the smallest detail 🙂 I am in the process of updating the tuts to match Revo 2.2 since some of the screenshots may not match the current version, as well as some of the links. I may also add some more installments to the series 🙂
I hope you enjoy the tutorials and find them useful. I look forward to your feedback
mary
Tuve problemas relacionados al lenguaje, con suerte pudo solucionarlos, de manera rápida he conseguido la instalación sin problemas en el idioma ingles
Where do I put the install files in my LAMP folder?
I have the following folders:
apache2, apps, common, docs, frameworks, img, licenses, mysql, php, scripts, sqlite, and varnish.
Thank you!
Sounds like you’re on Linux? If yes then you’re looking for a folder like /var/www. This is where your files would go.
I am and thank you very much!
Hi Mary, Here I am on a new comment page. Install went fine until log on. Can’t move forward as the following fills the localhost window,, “Warning: Invalid argument supplied for foreach() in C:\wamp\www\xxxx\manager\controllers\defaults\dashboard\widget.modx-” Followed by a call stack list which I can not attach here. Any suggestions?
John
I’ve never come across that error. I suspect that your install files were corrupted during download and so your dashboard won’t load. I recommend that you delete your installation, delete the database you created, re-download the MODX installation files again and try afresh. Hopefully this will work for you.
mary
I’m downloading and installing again as suggested.
Don’t know if this had any effect on the first install but, the extraction, placed the files and folders into a “modx folder ” inside another “modx folder” within the site directory I created for the new site. Had to move all the files into the root of that site folder. If there are hidden files in the extraction I did not move them.
Stopped again…same warning as before which I didn’t complete for you, it ends …defaults\dashboard\widget.modx-security.php on line 25… the Call Stack list has some entries the same as last time but new ones as well. functions are, modmanagerRequest>xxx
moddashboardWidget> most in “class.php” files two in index.php. Anyway to send a screen shot?
You can upload a screenshot to Picasa or Flickr or something like that and then share the link so I can take a look.
I honestly don’t know what could be causing that error. What version of PHP/MySQL is your Wampserver running? Have you checked that these specs meet the MODX Revolution minimum requirements as posted here – http://rtfm.modx.com/display/revolution20/Server+Requirements ?
mary
Thanks for following up Mary. MySQL 5.1.53, PHP 5.3.4, Apache 2.2.17. I checked all the Modx req. and meet them. All the Modx install checks were “OK” Error comes up when I log in. For screen shots I sent a Picassa link to your info@ emal, could post here if you like. Must be php code missing, which should have been placed into the xxxx.class.php code during install. Only thing I can think of is security, didn’t enter a password as this is local install not internet connected. Tried IE7 and firefox installs. Got to be simple error on my part unless Revo 2.2.5-pl is still “bugged”.
When you say you didn’t enter a password, what do you mean? As far as I know you must create an admin password for the site during installation.
hmm, on looking a bit closer at that call stack, it looks like your dashboard is having trouble pulling in the MODX security news feed that appears on the dashboard. It may be that you’re not connected to the internet and so it can’t pull in the news, or something else goofy is going on. I suspect this may be the issue. One way to test my theory is to disable the MODX Security feed on your dashboard and see if this error disappears.
In the top most navigation, hover over Dashboard, and click on the Dashboards link that appears in the dropdown. Then right click on Default and select Update. In the screen that opens you’ll see a list of widgets that are enabled for the dashboard. Right click on MODX Security Feed and click Remove from Dashboard.
Then on the top menu again click on Site->Clear cache and see if the dashboard loads ok. Or refresh the page.
See if this helps or if you get a new set of errors, and if you do get a new set of errors post them here and we’ll continue to troubleshoot.
mary
Yes you’re right I did the admin. I meant the MySQL when I set up the database. I just left it at root….don’t tell anyone, just shows how lazy I am. As I said it’s on another PC not connected to the Internet.
yeah that makes sense. Try the dashboard trick in my other comment above and see what happens
Also, in addition to the dashboard widget thing, make sure to change file permissions so your config file is no longer writeable
Just read the rest of your response, I did see that clear cache will fix some things. I can not get to the dashboard, the error you see fills the screen and although the dashboard looks like it is there behind the message, the screen is forzen, can’t even scroll. I have had to just closed the window and then tried the re-installs, 4 so far. I am deleting the DB and the instalation folder each time, also downloading a new Revo each time.
That’s quite strange. I’m currently on a Mac using MAMP and have no problems installing Revolution 2.2.5-pl locally. Don’t have a WAMP setup to try it on at the moment but don’t see why it shouldn’t work
When you log in the first time, do you get a pop-up/modal screen that says “Welcome to your MODX …” and then has some documentation on it?
Do the install with the internet connection on. When you first log in it pops up a modal screen with MODX documentation, and the dashboard has widgets that fetch news from the MODX site. This may be what is causing your error if you’re not connected to the internet while installing.
In addition, I recommend you manually create the MODX database yourself. Revo does need a MySQL database and if you haven’t created one for it it will try to create one named modx. So either you can create a new one yourself or make sure during the install if you’re depending on MODX to create the db for you you select a unique name for it since you already have another Evo install with probably the same db name.
Hope this helps
mary
I get to the point where I am asked for my Modx dashboard log in, after I correctly enter that, the dashboard tries to open but the error msg. fills the screen and will not allow me to do anything further. Going to try again in few min. with internet connected this time (although I think I had it connected one try ago) Perhaps I should try an older Revo version? Shouldn’t make a difference though?? Strange that the install runs perfectly up till that point, all the tests made by install run in the green. See my info@ note on how Modx created a DB for modx with 42 tables in Evo. but did not in Revo.
Thank you so much for your help Mary. I ultimately did an install that is working, although it took a very unusual method to do so. IE would not display some options such as drop down collation choices so I had to switch to Firefox for that, then Firefox would not move past one point, so I switched back. I ended up using both during one install. This as well as a problem with having to be offline at one point then being online again Shorty after to make progress, indicates a problem with my setup (either localhost or permissions or something) in some way.
It will be interesting to try and duplicate this..once I have caught up on sleep.
Next step, migrate the Evo localhost site to Revo.
Glad to help John. Hope the migration goes well for you
mary
Hello ppl.
First of all, this is a great tut, really learned to me how a CMS works.
But I encountered a problem at step 3 of the installation; I did all previous stuff but /setup doesnt work, I get error 404.
any idea where i screwed up?
Kevin
Make sure you’re navigating to the /setup folder, not just to the main url. So if your site url is kevinsite.com, to do step 3 you should go to kevinsite.com/setup.
Hope this helps 🙂
mary
Thanks for reply, yes I tried everything, took the whole path to the folder in url etc., but nothing.
i’ll keep on trying to find the bug, ty for the reply !!
it should work on apache server right?
Yes. Check that mod_rewrite is turned on.
If all else fails I would suggest deleting your MODX files and db, downloading MODX afresh and starting again. Sometimes it’s just a corrupt download issue. Also run through your server settings to make sure that they meet the MODX Revo install requirements
Gracias por estos tutoriales
de nada 🙂
its simple and great for the beginners.
Hi. Mary,
One thing I didn’t see in this tutorial – is there a recommended location for the MODX files? Should they be in the site root, or in a sub-directory?
Will the ability to run multiple sites from one MODX installation now make a difference to where you should install?
Thanks
Stephen