Welcome to part 11 of our series of tutorials on building a website with MODx CMS. So far we’ve looked at:
Part 1: Introduction to MODx
Part 2: Installing MODx
Part 3: Working with Templates
Part 4: Introducing Chunks
Part 5: Introducing Snippets
Part 6: Introducing Template Variables
Part 7: Introducing Ditto
Part 8: More Ditto
Part 9: Adding a Contact Form with eForm
Part 10: Adding Search Functionality with ajaxSearch
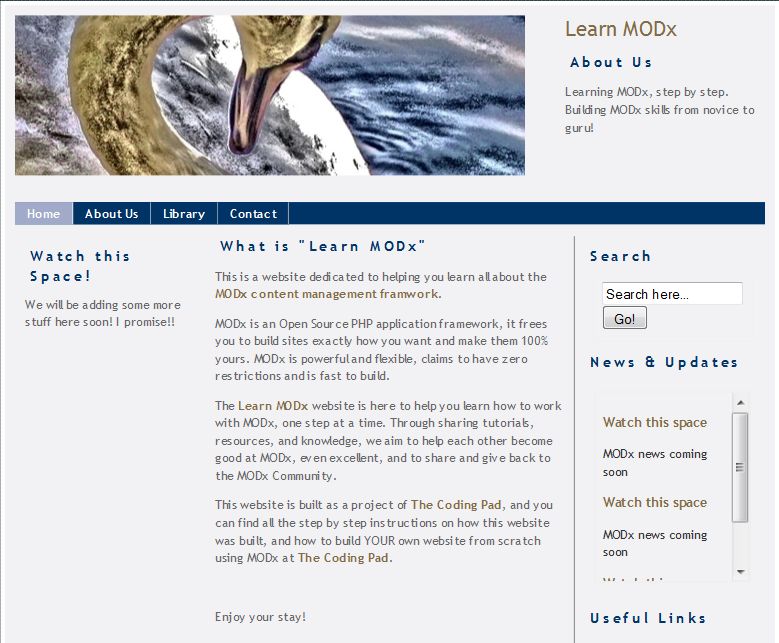
As we work through this series we’re building a MODx resource site – Learn MODx, adding functionality and expanding our knowledge. So far our website looks like this:
One of the core things that is desirable in any modern website is user interaction. So far we’ve implemented a contact form to allow our visitors to contact us, but in this post we’re going to go a step further and create a way for users to comment on our library selections and share their thoughts about the books we’re recommending. You can use this to add comments to a blog, or any other content type that you desire.
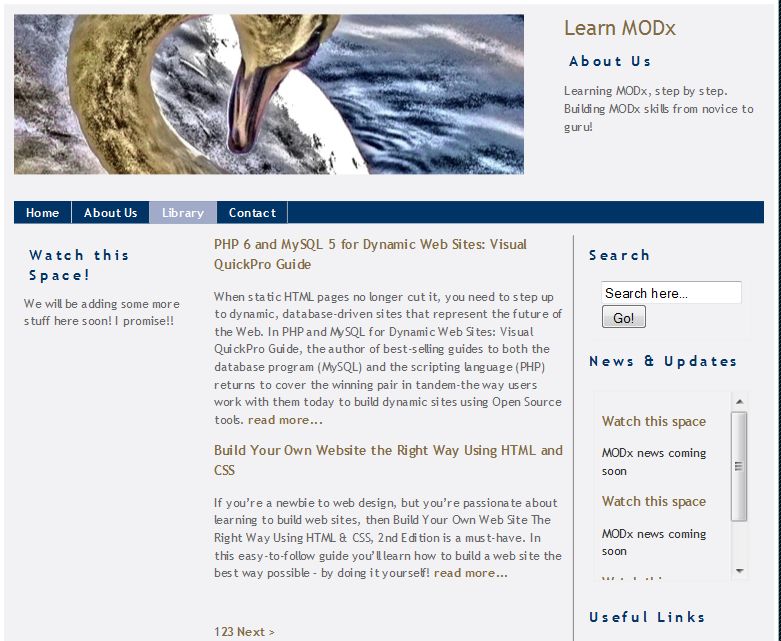
The snippet that we’re going to use for creating a comments section for our library section is the Jot snippet. Right now, our library listings consist simply of our little commentary of the book and nothing more. For reference, this is the main library page:
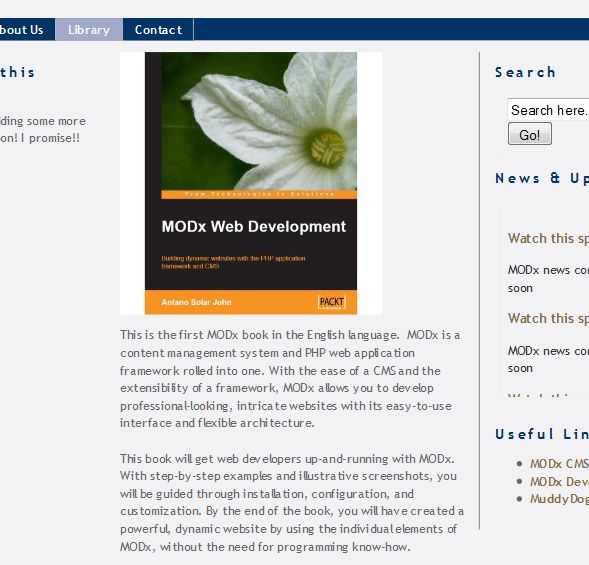
And this is what an individual entry looks like:
What we want is to have a comment form and comments appear below each entry so that visitors can leave a comment and read the comments left by others.
Let’s get to work! 🙂
Getting the Comment Form Up and Running
The first thing of course, is to go into your Resources area, under Snippets, and check to see if you have Jot installed and make sure you have the latest version. As of this writing, the latest version for Evolution is 1.1.4. If you don’t have it installed, you can download it from http://modxcms.com/extras/package/216 and follow the install instructions.
Like all other snippets, Jot has a basic call, and then additional parameters that you can use to customize it to your needs. You can find the Jot documentation with all parameters and settings in the further reading list at the end of this post. The basic Jot call is:
[!Jot? !]
Ofcourse we will add more parameters to further customize our call but for now let’s see what this does. You can add this call directly to the Library container page like we did with the Ditto call, or we can use a Chunk and then throw that into the library template. If you read the Wiki you will see that it is recommended that you place your call in a chunk. I also find it neater and easier to manage.
Create a new chunk and call it Library_Comments. Then type the basic Jot call above into the chunk and save it.
Next, under Manage Resouces->Templates, open your library template (in my case it’s called SwansongBooks) and add the chunk call right after the [*content*] . So now my SwansongBooks template looks like this:
{{swansong_header}}

{{swansong_leftsidebar}}

{{swansong_rightsidebar}}

<div id="content">

    {{bookImages}}
    [*content*]

        <div id="comments">
             {{Library_Comments}}
         </div>

</div>

<div style="clear:both"> </div>

{{swansong_footer}}
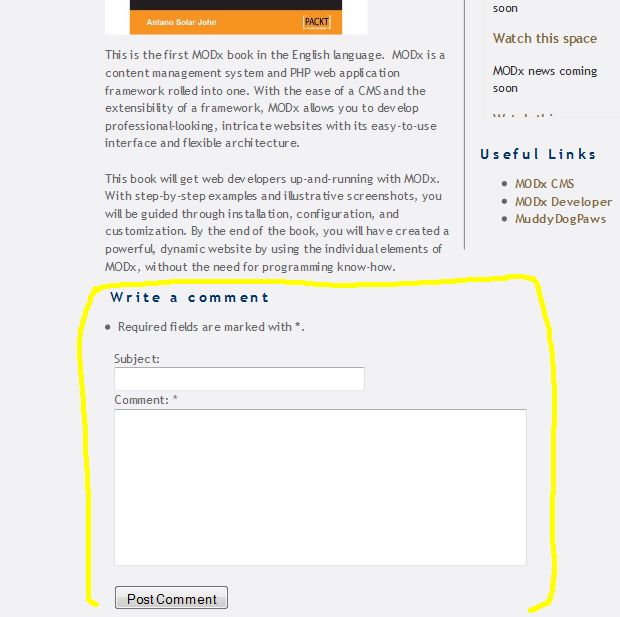
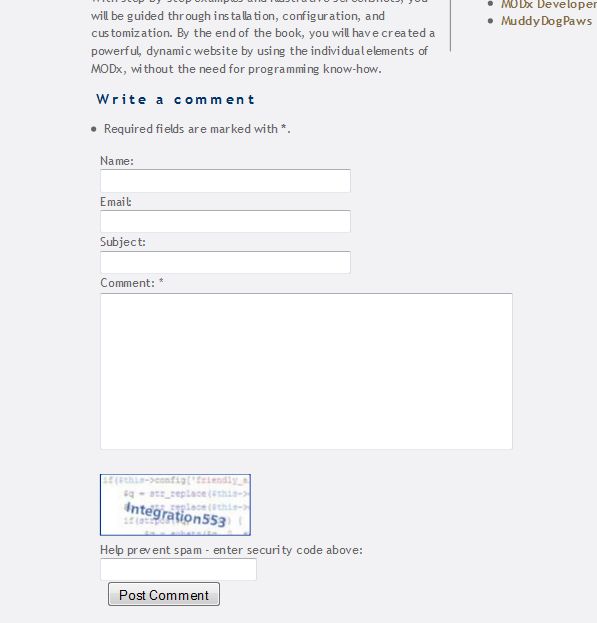
You’ll notice that I’ve placed the call to the Library_Comments chunk in its own div with an ID of “comments”. The reason for this will become apparent down the line. If we now take a quick look at an individual library page, and scroll right to the bottom, we see a comment form appear:
Excellent, we’re off to a good start 🙂
Configuring the Comment Form
Now we need to see what other parameters we can add to our Jot call to further configure our comment form functionality. If you look at the MODx wiki linked to below, you’ll see the long list of parameters, their default values, and what they do. I won’t go through all of them as that would be redundant.
The first and most obvious thing you worry about with comment forms is the possibility of abuse and spam. Two ways to tackle this is to moderate all comments (except maybe for certain individuals), or to use a Captcha to discourage bots. Many times you will use both options.
First I am going to set the captcha on for everyone except registerd users who are signed in, even though I haven’t created the possibility for my site to have registered users besides myself. Next, I am going to set moderation on.
[!Jot? &captcha=`2` &moderated=`1`!]
I would like my visitors to leave their name and email address on the comment form, which is common practice. We do this by adding the &customfields parameter. Once you add this to your snippet, it defaults to adding a name and email field, but you can add other fields such as url, etc.
[!Jot? &captcha=`2` &moderated=`1` &customfields=`name,email`!]
Be careful with the &customfields parameter because you should not have any spaces in the comma separated list of fields.
Now that I have a name and email field, I want to make those two fields required, meaning a commenter must leave a name and email address. To do so I use the &validate parameter like so:
[!Jot? &captcha=`2` &moderated=`1` &customfields=`name,email` &validate=`name:Please enter your name,email:Please enter a valid e-mail address.:email`!]
Again, make sure that there’s no spacing between the comma separated values of the &validate parameter. You can read up on the syntax of these arguments on the Wiki page linked to at the end of this post.
The final thing I want to add to my comment form is pagination so only 5 comments appear per page. So my final Jot call looks like this:
[!Jot? &captcha=`2` &moderated=`1` &customfields=`name,email` &validate=`name:Please enter your name, email:Please enter a valid e-mail address.:email`&subscribe=`1` &pagination=`5`!]
OK, let’s take a look at our page. To clearly appreciate the changes, make sure that you’re logged out of the admin area so that you can see all the fields as well as the CAPTCHA.
There are a lot of other configuration parameters we can add, for example you can disallow a predetermined list of words from the comments by setting &badwords. You can also specify a group of users who are allowed to moderate comments using the &canmoderate parameter, and so on – lots of possibilities!! 🙂
For now though we’ll leave it at this and then revisit it once we’ve added usergroups and allowed membership on our MODx site.
Go ahead and test your comment form and make sure it works like you want it to.
Moderating Comments
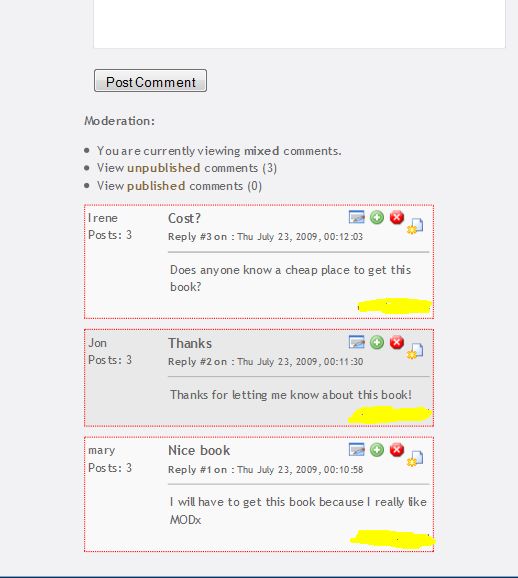
To see the comments that have been posted, log back into your site as admin and open the entries from the front end. You will then see the unpublished comments at the bottom so that you can moderate them.
When you’re logged in as admin, you can also see the IP addresses of all the commenters, which I have yellowed out in the screenshots. However, once logged out the IP addresses are no longer visible.
One thing that still has me baffled is how to moderate comments on the backend of your MODx site. As far as I can see, you can only moderate comments from the front end. If anyone knows different, please let me know!
Layout
You will notice that by default, Jot displays the comment form before the comments. I prefer to have the comment form after the comments in my websites. We can change this easily using the &output and &placeholder parameters. We first set &output to zero to hide the output, and then specify that we want to use placeholders.
[!Jot? &captcha=`2` &moderated=`1` &customfields=`name,email` &validate=`name:Please enter your name, email:Please enter a valid e-mail address.:email`&subscribe=`1` &pagination=`5`&placeholders=`1` &output=`0`!]
Then below the Jot call, add the placeholders in the order in which you want them.
[+jot.html.comments+]
[+jot.html.navigation+]
[+jot.html.moderate+]
[+jot.html.form+]
So this will place the comments first, then paging, then the moderation options, and finally the form.
I will also add a Comments title. So my final Library_Comments chunk looks like this:
[!Jot? &captcha=`2` &moderated=`1` &customfields=`name,email` &validate=`name:Please enter your name,email:Please enter a valid e-mail address.:email` &pagination=`5` &placeholders=`1` &output=`0`!]

<h3> Comments</h3>
[+jot.html.comments+]
[+jot.html.navigation+]
[+jot.html.moderate+]
[+jot.html.form+]
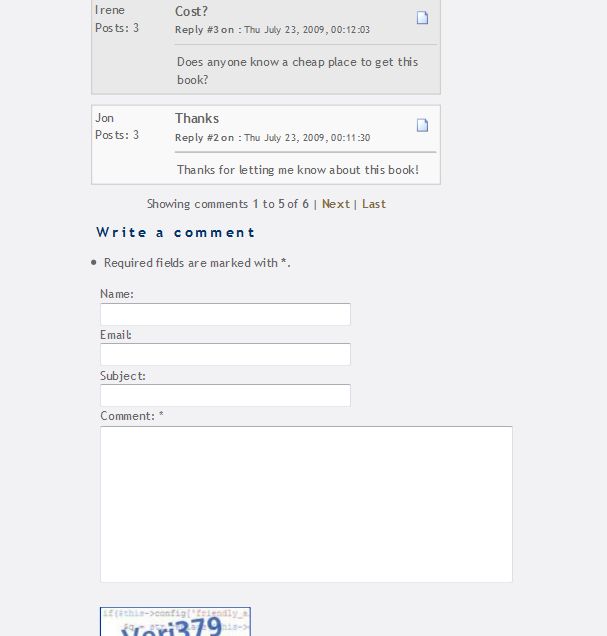
Let’s now go back and take a look at our page where I’ve added a few comments:
You can see now that everything is appearing in the order I specified, with comments first and form last. You can also see that I have paging of comments with five comments per page.
How Many Comments?
The very last thing I’m going to do with this is to make it so that on the main Library page, the visitor can immediately see how many comments each entry has even before opening it. To do this, we need to edit the template we use for the Ditto call. Let’s refresh our memories by opening the Library page for editing and looking at the Ditto call:
[!Ditto? &parents=`4` &tpl=`librarytemplate` &display=`2` &paginate=`1` &paginateAlwaysShowLinks=`0` !]
You can see that we created a template chunk called librarytemplate to format the output of our Ditto call. Let’s now navigate to Manage Resources->Chunks and take a look at the librarytemplate chunk:
<h3><a href="[~[+id+]~]">[+pagetitle+]</a></h3>
[+introtext+]
<a href="[+url+]">  read more...</a>
What we need to do is to add a Jot call to this template that only shows the number of comments for the particular entry. To do this, we simply need to add
<a href="[~[+id+]~]">Comments ([!Jot?&docid=`[+id+]`&action=`count-comments`!])</a>
By now you should be familiar enough with the MODx syntax to know that this will add a hyperlinked entry with the word Comments, and we’ve added the Jot call in parenthesis with only one argument – &action. The role of &action is to determine what will be displayed when you call Jot. By default, it displays the form and the comments, and so we don’t need to state it explicitly if that’s all we want to display. This is why we didn’t add it to our initial call. But in this case we want to display the number of comments, so we set it to count-comments.
So now the contents of our libarytemplate chunk will look this:
<h3><a href="[~[+id+]~]">[+pagetitle+]</a> - <a  href="[~[+id+]~]#comments">Comments ([!Jot?&docid=`[+id+]`&action=`count-comments`!])</a></h3>
[+introtext+]
<a href="[+url+]">  read more...</a>
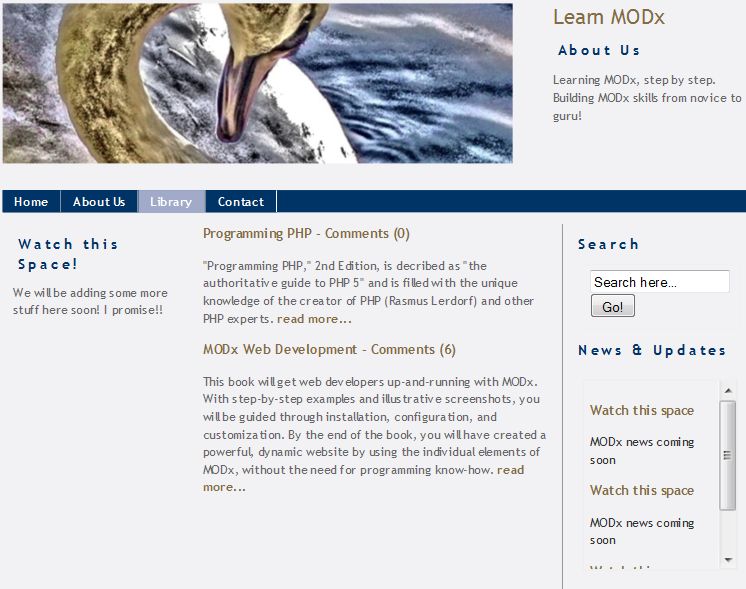
One last little touch I’ve added is to place the div name of the Library_Comments chunk as an anchor tag to the link so that a visitor can click on it and go straight to the comments. That is why I put the call in a div! 🙂 If we now take a look at our Library page, you will see that each entry title states how many comments the entry has.
And there we go! We’ve covered quite a bit today, and hopefully you can see how Jot can be applied in different scenarios, for example in creating a blog or any other content type with comments in it. There’s a lot more to explore in the documentation linked to below, and I encourage you to spend time in the forums and see how people are using and customizing Jot on their websites.
As always, comments, corrections, and questions are always welcome ![]()
And don’t forget to grab your copy of the MODx Web Development book!
Further Reading:
Jot Documentation – http://wiki.modxcms.com/index.php/Jot
Jot Support Forum – http://forums.modx.com/board/?board=71
Hi Mary, great work! Thank you!
Mary, I’m writing because at this late date (Dec. 2011) I need to go back to Evo owing to Revo’s missing, client-friendly frontend. Which means I’m working with jot instead of quip and I walked through your splendid tutorial here, but can’t customize my calls the way I would like because this remark of yours is suddenly far from redundant: ‘ If you look at the MODx wiki linked to below, you’ll see the long list of parameters, their default values, and what they do. I won’t go through all of them as that would be redundant.’
All ‘Further Resources’ have gone 404. I’ve wended my way through plenty of German and English MODx threads picking up this and that, but it would be great to see the missing wiki, or find some original documentation. Any leads? (I have the MODx Web Developer book, but also there – jot-parameter-wise – it’s ‘wish to learn more? Consult the wiki’…)
Craig,
The wiki link http://wiki.modxcms.com/index.php/Jot works for me. The forum link is now http://forums.modx.com/board/?board=71
mary
Hello Mary,
I like your tutorial a lot. Are there more parts coming?
Regards,
Frank
Frank
The MODX CMS seems to have moved on from MODX Evolution to MODX Revolution, so unless there are specific requests for particular MODX Evolution topics I probably won’t be doing any new ones. The MODX team does not seem to have plans to continue to actively develop and support MODX Evolution as they’re not focused on MODX Revolution. I have done a series of beginner tutorials on MODX Revolution also on this blog, so if you’re building any new sites that is probably the way to go.
mary
Hola! la verdad me gusto mucho el tutorial, me gustaría saber si tu cuentas con algunos de los documentos que mencionas para descargar ya que no los encontre.
sandra
Not sure which documents you’re referring to? If you tell me which ones I can try and find the download links for you
mary
Hello Mary, you have done another excellent tutorial as always. It is good that some people still use evolution. Personally, i don’t like revolution that much.
Anyway,i wanted to ask you, how did you do the “Notify me of followup comments via e-mail” functionality?And how did you manage to make the subscribe link into a checkbox?
(i am assuming you used jot as well)
I know, these questions might sound rather simple, but i am kinda new to modx 🙂