This is the sixth segment in my series of tutorials on building a Drupal website from scratch. I have been working on a lot of stuff and sort of drifted away from working on these tutorials, but I’m back to finish this up. This definitely won’t be the very last Drupal tutorial I ever do. I anticipate that you’ll be seeing a lot more Drupal related stuff at the Coding Pad, but this will wrap up the beginner basic stuff on getting the website completed.
OK,so far we’ve Introduced Drupal, learned how to install Drupal, we then set up and configured a Drupal site, and we went over how to build the Drupal site with blocks, menus, and modules. Finally, in our last tutorial, we talked about content. Recall that I have been working on a website concurrently with this tutorial: The Drupal Pad, and everything in these tutorials is implemented on that site.
So in the last tutorial we looked at the options under creating content,and we discussed the various default content types. So why don’t we go ahead and start fleshing out our website. Recall I said that we would start out by installing the Pathauto module so we would get our urls looking good from the start? I’ve decided to make that the topic of a different Drupal tutorial so as not to get things too complicated. Let’s just go into content for now and we’ll look at Pathauto in the next Drupal tutorial.
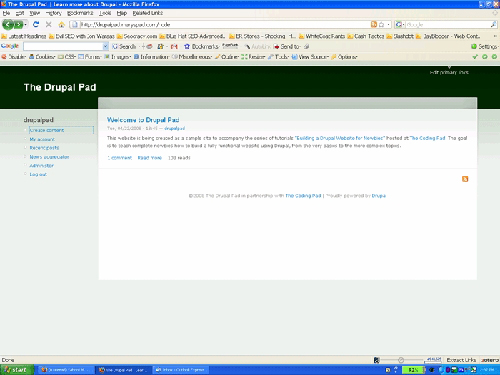
This is what my website looks like so far. We modified the basic Garland theme and changed the colors, removed the logo and favicon, to make it all look a little more unique. We also added some basic content to the front page to let our visitors know what the Drupal Pad is all about. In case you need a refresher on how we made all these changes, you can revisit the tutorial on how to build the Drupal site
Log into your drupal site now, click on Administer and go into Create Content. As you recall from the last tutorial, Drupal by default comes with three content types, Page, Poll, and Story. The current content that we have on the front page of the Drupal Pad was created as a Story. We’ll leave that there for now and create a Page which we will tell more about the Drupal Pad. Pages are good for static content, in other words, stuff that we’re not going to be talking about or dealing with much, such as Contact Information, Site Disclaimers, Terms of Use, etc.
Let’s start by creating an About Us page. On the Create Content page, click on “Page”:
The title is going to be “About Us”, and in the body we put some text about the Drupal Pad. The section that I want to focus on is the options below that. Leave the input format as it is since we won’t be adding any code or scripts to this page.
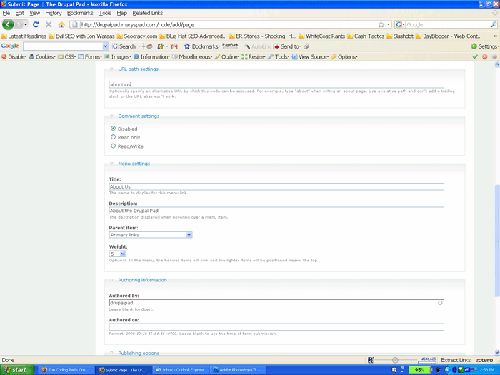
Since we turned on friendly urls, I can specify a friendly URL in this section. So I put in “about-us”. If I had pathauto enabled, this value would be entered for me automatically based on my page title and settings. But for now we enter it in manually. We disable all comments since we don’t really need any discussion about us.
The next part is the Menu section. We want people to be able to easily find this page when navigating the website. When they come to the Drupal pad, we want them to be able to know who we are and why we’re here. So we want the about us page to be accessible from a menu somewhere.
Drupal allows you to create menus and place them wherever you please, and we’ll learn all about that in future tutorials. By default, Drupal comes with a primary menu at the top of the page which you can see on the Garland theme we have installed. At the very top right corner when you’re signed in as admin, it says “Edit Primary Links”. The other menu is the Navigation menu on the left hand side which you’ve been using. It contains the Create Content link, the Administer link, etc. These menus might appear in other places in different themes, but for the Garland menu by default they are as described.
I want my About Us link to appear on the primary link at the top of the page, so I select Primary Links from the drop down box as shown in the screen shot above. The weight determines where in the menu this particular link will fall. Heavier items (those with greater weight) fall farther at the end of the menu will lighter items are at the beginning or top. At this point I don’t know how many items will be on that menu. I’m kind of planning this as I go, but in real life website planning, ideally you know where you want everything to go before you start. I do know that it should be one of the last items on the menu so for now I’ll give it a weight of 5.
Note: If you don’t assign different weights to menu items, i.e. if you leave them all with a weight of 0, then Drupal arranges them in alphabetical order, which can be useful in some cases.
We leave the authored by item as it is, and leave publishing options as they are. We don’t want to promote the About Us page to the front, so that’s fine.
OK, so let’s publish our About Us page. You should get a view of your page and a message that the menu item and page were created successfully. And at the top right hand corner you should now see the menu item “About Us”,which if you click takes you to our new page.
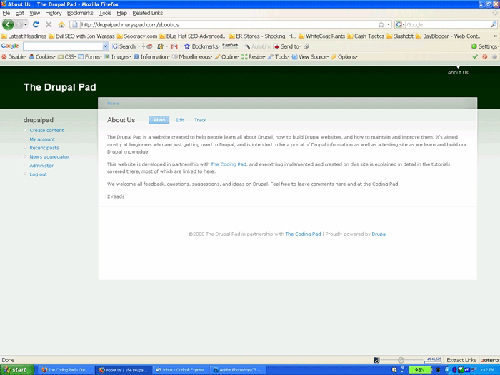
If you look at the url, it’s a friendly one that is descriptive of our page. We’ll go ahead and add one more page to our website, and that’s a Contact Us page. We want people to be able to reach us and give us feedback, tell us about new things, and point out our typos and such. Drupal comes with an inbuilt contact module that you just need to activate. We want the Contact Us link to appear in the primary links at the top of the page, and my preference is to have it just after the About Us link. Remembering we gave the About Us link a weight of 5, we want to give the Contact Us link a weight of 6.
OK, so go into Administer, and go into Modules (under Site Building). Recall that we enabled the Contact module in a previous tutorial. So it should be enabled. If it isn’t, go ahead and do that now. Next, still under Site Building, click on “Contact form”. You should see a screen that looks like this:
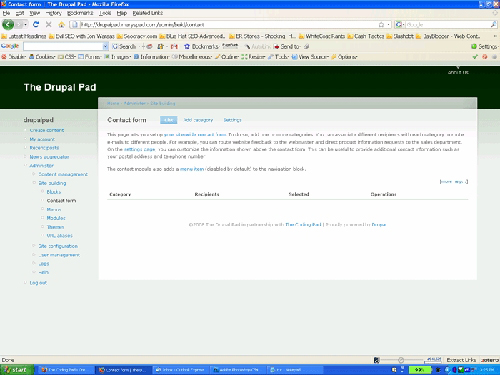
You have three things you can do on that page: List – shows you the categories you have. Add Categories allows you to add categories. And Settings allows you to change some settings on your contact form. The first thing you want to do is to create a category. This is useful if you’re going to have several contact forms. Say you’re building a website for a company that collects plastics and uses them to manufacture widgets. You want people to be able to contact you about random plastic citings, widget sales, possible widget franchising, website problems, faulty widgets, etc, and you want them to be able to select this from a list. You may also want the various types of emails to go to different email addresses.
So go ahead and create a category. Mine will be “Tutorial feedback”, “Questions”, and “Corrections”. Click on “Add Category”, and this what you see:
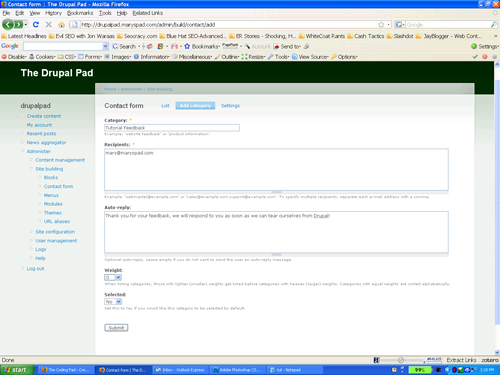
The Category is where you put your category name, in my case, Tutorial Feedback. The next section is where you specify the recipients of any emails under that category, so you may want any emails about Website troubles to go to the webmaster, about manufacturing defects to the head of manufacturing department, etc. You can specify more than one email address. You can put an Auto Reply that will be sent immediately to the person leaving a message to let them know you got their message and will respond. The weight works the same way and determines where in the list of categories this particular one will fall. Finally the “Selected” options lets you choose what the default category will be that appears on the contact form. In my case I want the default category to be “Questions” since I expect people will be writing mostly to ask me about features implemented on the site.
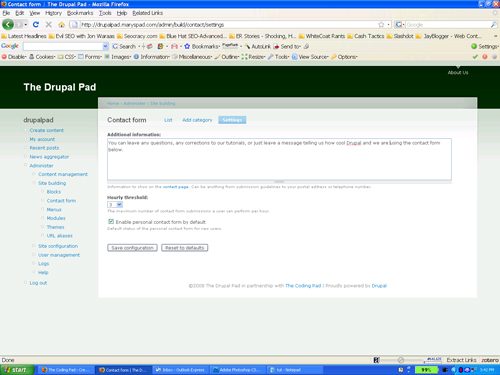
The other thing you want to look at is the “Settings” on the Contact form page. This allows you to set what you want the text to be the user sees on the contact page. The default text is “You can leave a message using the contact form below.”. I will modify mine a little. You can also on this page change the maximum number of contact form submissions a user can perform per hour. The default is 3, and I leave mine at that. I also enable the contact form by default, so I don’t change that option either. Click on “Save Configuration”. So my settings look like this:
So we now have our contact form all ready to go, but we need a way for our users to see it, so we have to put it on our menu. To do that, we go to the Menu administration page. Click on Administer, under Site Building click on Menu. If you look under Menu Item, the very second item is Contact, but it’s kind of greyed out and has the word “(Disabled)” next to it.
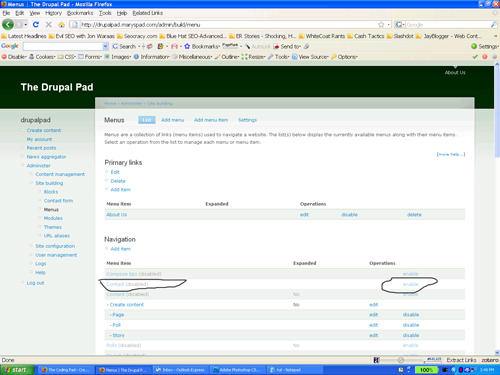
We want to go ahead and enable that. Click on “Enable”, and go ahead and enter the needed information. I want my contact form link to appear on the primary links, right after the About Us link, so I select “Primary Links” and give it a weight of 5.
Looking at our website now we have a nice front page as before, but we’ve added an About Us page, and a Contact Us form, with links to the two appearing at the top of the page.
Our website is looking good, and getting more and more individualized. At this point, we have a full fledged website, and you can play some more with it, add more pages, add more stories, and whatever else your heart desires. There are many more things we can do and add to our site, modules, themes to change the look, and so on. In future segments I will be discussing these features and more, adding them to the Drupal Pad and just generally fleshing the website out more, adding content, images and more. And remember that everything I do on that site will be described in tutorials here. So please go ahead and subscribe to this blog, bookmark it, and stay tuned for more Drupal and coding stuff!!
Thanks for hanging with me!