Welcome to part 9 of our series of tutorials on building a website with MODx CMS. So far we’ve looked at:
Part 1: Introduction to MODx
Part 2: Installing MODx
Part 3: Working with Templates
Part 4: Introducing Chunks
Part 5: Introducing Snippets
Part 6: Introducing Template Variables
Part 7: Introducing Ditto
Part 8: More Ditto
As we work through these tutorials, we’re building a MODx resource site called Learn MODx. So far we have a pretty functional website and I hope that you’re picking up enough knowledge and interest along the way to experiment with MODx and add features and functionality to your website.
In this installment, we’re going to look at how to add a vital part of any website, the contact form, to our MODx website, using the eForm Snippet.
When visitors come to your website you want them to be able to communicate with you if they need to, maybe to send you feedback about your website, ask questions, inquire about your services, etc.
Before the days of spammers and spambots (I imagine there was once such a time) this was a trivial issue. You simply stuck your email address on your website for the whole world to see and use. Unfortunately, doing this today is simply inviting bots and spammers to harvest your address and fill your inbox with rubbish! 🙁 One way to combat this problem is to use a contact form, which while not foolproof, is a much better option than just posting your email address(es) to your website.
In this post, we’re going to use the eForm snippet to create a contact form for the LearnMODx website. We will also include a captcha to make it hard for bots to spam us from the contact form.
QUICK NOTE: If you’re following along step by step with these tutorials you may notice that some of my page IDs have changed from the previous tutorials, this is because I had to rebuild the site after some glitch on the server, but everything will work the same, so don’t be too thrown off if the screenshots show different page IDs from previous installments of this tutorial.
Also, remember that if you’re copying and pasting code from the tutorial, be careful with the quotation marks (” “) since WordPress (0r my theme) messes them up, so go back and retype them in your code to avoid troubles. Don’t change the back ticks (`) though.
What is the eForm snippet? eForm stands for electronic form. From the MODx wiki:
eForm is a highly flexible form parser snippet that will let you convert web forms into an email which can then be sent via email to users you can specify in the snippet or the form. Some notable features include:
- Form validation using powerful validation rules
- Protection of hidden fields against tampering
- CAPTCHA support
- Supports html email with attachments
- Flexible report & page generation using placeholders
- Notification to mobile devices
- auto-respond email
- Support for CC and BCC fields
There’s a lot you can do with the eForm snippet, and at the end of this post you’ll find some links for more reading on the snippet. For this post, we’re going to utilize the eForm snippet to make a contact form where our site visitors can send us feedback, ask MODx related questions, or request MODx related services.
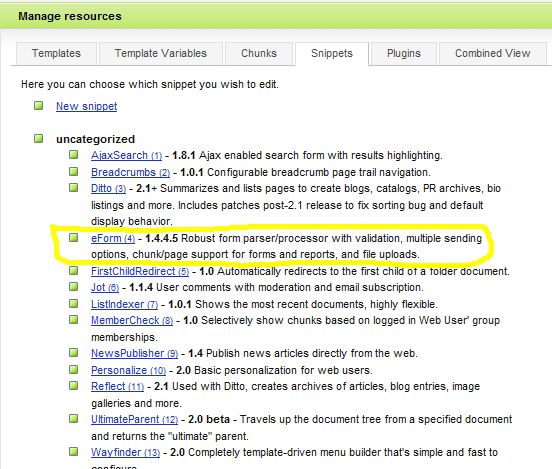
I’ll be using version 1.4.4.5 of the snippet which I installed with my initial install of MODx.
If you didn’t elect to install all snippets and you find that it’s missing from your snippet list, you can download it from the MODx repository (http://modxcms.com/extras.html) and follow the install instructions.
Important note: The eForm snippet comes with extensive document in the download. If you look in the snippet folder, you’ll find a subfolder titled Docs with lots of documentation to learn from, and the code I’m using in this tutorial comes from those documents.
The eForm snippet takes several parameters. At the minimum, you need to have these three parameters: &formid, &tpl, and &report.
&formid – the identity (id) of the form on the page that this snippet will manage.
&tpl – the chunk name or document id to use as a template
&report – the chunk name or document id to use when generating reports. (We can leave out the &report parameter if we use the &noemail parameter).
There are other optional parameters that we can use, and you can find all the details on the documentation in the eForm docs folder when you download it. Note that all the code I’ll use in this tutorial comes directly from the documentation in the download. It really is a well documented snippet 🙂
Alright, let’s get started.
Creating the Contact Form Chunk
We’re going to begin by creating our contact form and the chunks that will template it. In your admin backend, go into Resources -> Manage Resources -> Chunks (you should be an old hand at this by now 🙂 ) We’re going to create a new chunk and put some nice HTML form code with a couple of MODx placeholders in there to create our form:
[+validationmessage+]
<form method="post" action="[~[*id*]~]"><input type="hidden" name="formid" value="feedbackForm" />
<label for="name">Your Name</label>
<input maxlength="60" name="name" type="text" />

<label for="email">Your Email Address</label>
<input maxlength="40" name="email" size="40" type="text" />

<label for="department">Subject</label>

<select name="department">
<option value="1">Website feedback</option>
<option value="2">MODx Question</option>
<option value="3">MODx Service Request</option>
</select><label for="comments">Comments</label>
<textarea cols="40" rows="10" name="comments"></textarea>

Please enter the anti spam code below:

<img src="[+verimageurl+]" border="1" alt="verification code" />

<label for="vericode">code</label>
<input name="vericode" size="20" type="text" />

<input name="submit" type="submit" value="Send Feedback" />

</form>
The start line has a placeholder [+validationmessage+] which will place an error message if the form submission fails, such as if a field is left blank. At the end of the form is another placeholder[+vericode+] for the Captcha.
This completes the actual form chunk. Save it as eFeedBackForm.
Creating the email template chunk
Next, we want to create the template for the email that will be sent when a form is submitted at our website.
<p>This is a response sent by [+name+] using the feedback form on the website. The details of the message follow below:</p>
<table>
<tr valign="top"><td>Name:</td><td>[+name+]</td></tr>
<tr valign="top"><td>Email:</td><td>[+email+]</td></tr>
<tr valign="top"><td>comments:</td><td>[+comments+]</td></tr>
</table>
<p>You can use this link to reply: <a href="mailto:[+email+]?subject=RE:[+subject+]">[+email+]</a></p>
You can see again that this is just simple html with some MODx placeholders. Pretty simple huh? 🙂 Save this chunk as eFeedBackReport.
If you want to you can create another template chunk for an autoresponse or thankyou email to be sent to the sender’s email address. There’s an example of this in the eform documentation bundled in the download.
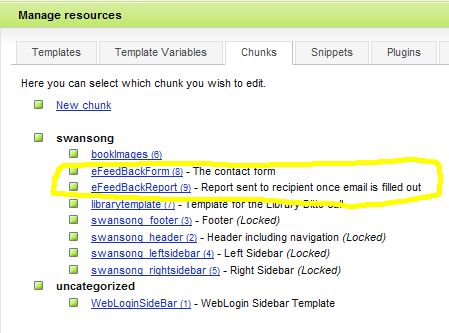
So we now have two new chunks:
And we’re now ready to create the contact page and call the eForm snippet.
Creating the Contact Page
We’re going to create a new document and name it Contact. Select to have it show in the menu. Make sure that you have the tinyMCE editor turned off (on the Page Settings tab, uncheck the RTE box). We’re going to call our eForm snippet uncached, with the three required parameters as specified earlier in the post:
[!eForm? &formid=`feedbackForm` &tpl=`eFeedBackForm` &report=`eFeedBackReport`!]
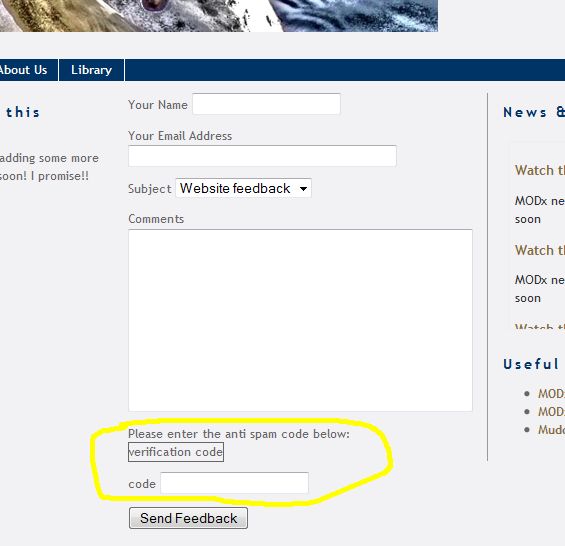
That’s our basic call. If we save our new document and preview it, this is what you should see:
As you can see, the eForm snippet call has placed a form on our page according to the html code we entered in our eFeedBackForm chunk that we created earlier. However, you’ll notice several things one of which is that the captcha area doesn’t look quite right. Also, if you think about it, we haven’t specified where the data entered into the contact form should be sent and what the subject of the email should be. We’ll fix these three things by adding some more parameters to our snippet call:
&to– this will tell the form to what email address to send the information filled in the form
&subject – this will be the subject of the email sent
&vericode – Adding &vericode=`1` to the snippet call will replace the [+verimageurl+] placeholder in the form with a CAPTCHA generated image. On submitting the form the vericode field is then validated against the text displayed in the image.
So now our snippet call should look like this:
[!eForm? &formid=`feedbackForm` &tpl=`eFeedBackForm` &report=`eFeedBackReport` &to=`your@emailaddress.com` &subject=`Message from LearnMODx` &vericode=`1`!]
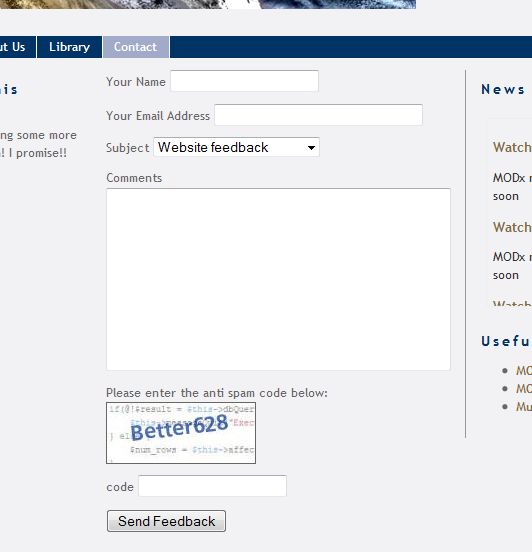
If you now save and publish your contact page, you will see that we now have a Contact item in the menu, and the captcha image now appears.
If you’re working on a live site you can test the contact form and make sure it works. If building on your local computer, you may need to do some configurations to your setup to allow your form to send email out.
There are other parameters that you can set in your call, such as a thank you email as mentioned earlier, and more.
There are also other uses you can put the eForm snippet to, and a contact form is just one example. If you visit the MODx forums and search for eForm, you’ll find a wealth of information on eForm uses and configurations. I have added a link at the end of this post to the official eForm forum on the MODx site, as well the Wiki page. In addition, as I mentioned, the eForm comes with some really good documentation bundled with it, just look in the eForm/docs folder.
This brings us to the end of this installment of the ongoing MODx tutorial series. Stay tuned and keep on MODx’ing! As always, please feel free to leave a comment with any questions, corrections, hellos, etc 🙂 And don’t forget to grab your copy of the MODx Web Development book!
More Reading:
eForm Documentation – http://wiki.modxcms.com/index.php/EForm
eForm Support Forum – http://modxcms.com/forums/index.php/board,200.0.html
Docs subfolder of the eForm download folder


Hey Mary thanks for the quick response. I’m working on a site in spanish so I put a &language=`spanish` in [!eForm? … !] and didn’t work, also tried ‘sp’ and ‘es’ but is not working. Any idea? Thanks again.
I believe it should be &language=`es`. Make sure you clear your site cache too. Also, what’s your database charset, I’m pretty sure it needs to be utf8.
HTH
mary
Hey, great tutorial. But you missed the subject drop down in the report, how to show the chosen option from in report> , putting the name of the select in [+ +] doesn’t output anything. Can’t find answer anywhere.
Thanks for the tutorial, very clear and easy to understand. I couldn’t make much sense of the original documentation but your guide made it very clear.
Thanks again
Dig,
thanks for the feedback. Glad the tutorial was helpful 🙂
mary
Great tutorial! Thank you.
A newbie question: what do I have to do to save the content of the form in a db table? I want to keep a copy of all submitted forms content outside the mail system for safety/backup reasons.
Thank you in advance!
Dan, take a look at http://wiki.modxcms.com/index.php/Use_eForm_to_Store_data_into_Database
Should get you on the right track
Mary
Thanks for the wonderful post. I have a query. I am using Modx Revolution and FormIT. Just want to insert the captcha on the form, is this possible in it?
Yogesh
Not sure I follow what you mean. I have explained in the post how to use reCaptcha with FormIt. Could you explain a bit more what you’re wanting to do?
thanks
mary
Mary,
Your post was sufficient alone to solve all my issues all i forgot is to give many many thanks to you to write this beautiful support document. Honestly neither the Modx support nor the Formit support were able to solve my issue but your post did. Thanks Again.
Yogesh
Good to hear, thanks for the feedback 🙂
mary
Hi..you posts are really useful.i wanted know that can we have user restriction on the resources?
i wanted to asign perticular user to perticular resource.
Yes you can. If you check the MODX documentation there should be some instructions. I haven’t got around to writing any tutorials about that. But yes, it’s definitely possible.
mary
How to test this feedback option in local server,
please send that method to my mail
thank you
One way is to configure the php mail function on your local server. A search on google should help you out 🙂