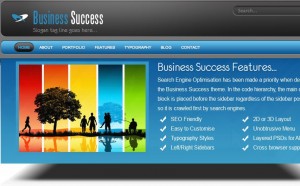
 Welcome to Part 4 of the MODx Revolution for Complete Beginners series. In the last installment, we did some basic site configuration and looked at how to set/change global site settings such as the site name, and all that. We also explored how to install extras from the MODx repository using package management. In this post, we’re going to start looking at how to work with templates in MODx Revolution. We’re going to start with a static HTML/CSS template and, over the next few installments, transform that into a MODx Revolution template.
Catch up:
Part 1: Introduction
Part 2: Installation
Part 3: Basic Configuration and Installing Extras
What are MODx Templates?
MODx templates are simply HTML/CSS templates with MODx tags inserted for dynamic functionality. This is a very simplistic definition, but in my mind it captures the essence of what a MODx template is. If you know how to code HTML/CSS or can get your hands on a coded HTML/CSS template, the rest is easy. This one aspect makes MODx very designer friendly.
For the purpose of this tutorial, I have decided to source a theme from Themeforest for my site. If you want to follow along directly you can download this same theme (which I have now provided here as it’s no longer available on Themeforest) and work with me or you can use any template of your choice, whether one you’ve designed and coded yourself, or one you’ve downloaded from the web (searching Google for ‘free css templates’ should give you a good selection to start with). The principles will be the same, and if you have some knowledge of HTML/CSS what I am doing in this tutorial and the ones following should be similar in implementation to any template you pick.
Disclaimer: The themeforest links on this post are affiliate links, so if you make a purchase from clicking on them I get a few pennies, which helps me keep running this blog.
The template that I will be working with on this site is the 7 in 1 Business Success Site template. I picked this template because it looks good and is simple but yet complex enough to make it interesting to port into a MODx website. Additionally, it comes in 7 different color styles. I will use the blue, and you’re free to choose whatever color you want. So let’s get started!! 🙂 Remember that as we’re working through these tutorials we’re building a live site, a resource site for learning MODx Revolution, but should you work through these tutorials at a later date I am adding a lot of screenshots as you go so you can see the work in progress.
The first thing I want to mention is that the method I will follow here is my own method/system of setting up templates in MODx. It’s not the only way, nor is it the best way, it’s just my way. MODx doesn’t restrict you in terms of where to place your files, how to break down your template, etc etc. It’s up to you, what you’re more comfortable with, or what your client wants. So keep in mind as you follow along that this is not set in stone, you can play around with it and make it work for you the way you want it to.
1. Upload the Template Files and Assets
Any template you use will come with assets – css files, js files, images, flash files, etc. These need to be stored somewhere on your server so that your template can access them. My personal preference is to store all template assets in a template folder inside the assets folder. Again, you could really put these anywhere and just set the paths accordingly in your template.
On unzipping the template files, the file structure looks something like this:
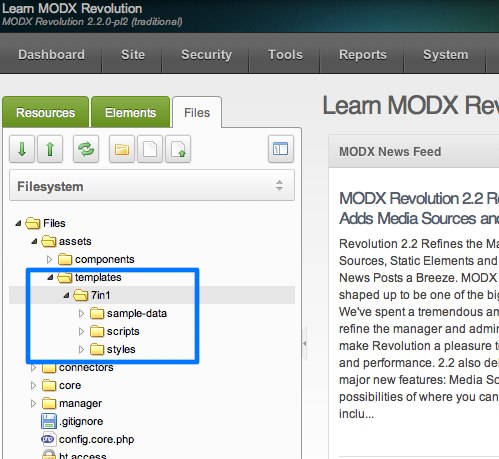
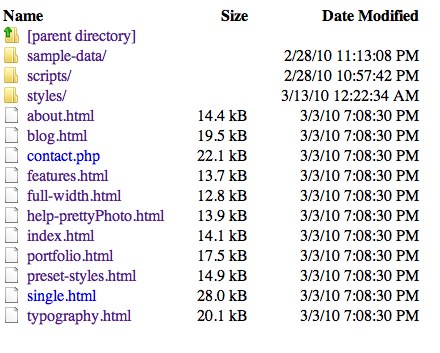 So the first step is to upload the three asset folders, sample-data, scripts, and styles to the web server. I have created a folder named templates inside the assets folder, and to that I have added a folder titled 7in1, into which I upload the three assets folders referenced above. So if we now look in the site manager, under the Files tab, we can see the new folders and files that I have uploaded:
The files are now accessible to any templates we build, and remember that you can store these files in any folder you want, or even one that you create outside of the existing folders. I just prefer to use the assets folder.
2. Create the Template
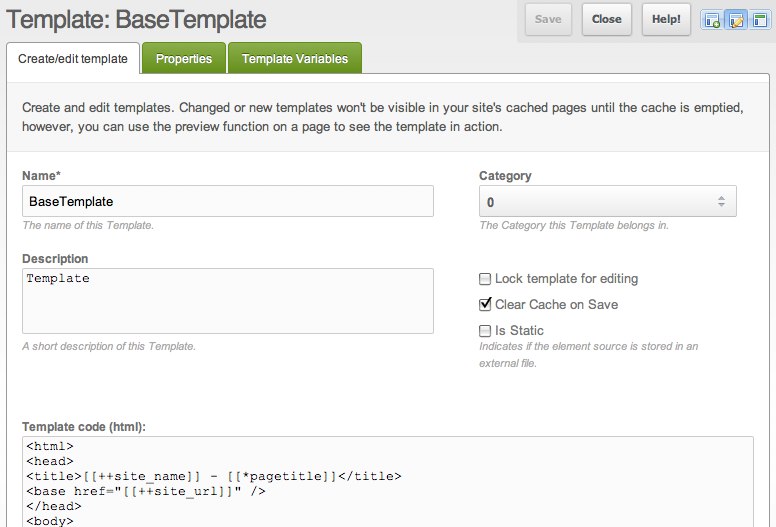
Now that our template assets have been uploaded, we can now begin the process of creating the template in MODx. In the backend, click on the Elements tab on the left, this reveals the various site elements – templates, chunks, template variables, etc. Clicking on templates reveals that there is one template available, called the Base Template. If you click on it, you can see that this is a very basic template which, as you can see, is just some straightforward HTML code with some tags (e.g. [[++site_name]], [[*pagetitle]]) added to it.
These types of tags are what transform the static HTML/CSS code into a dynamic MODx template, and we’re going to be learning about them hands on, as we build out our site.
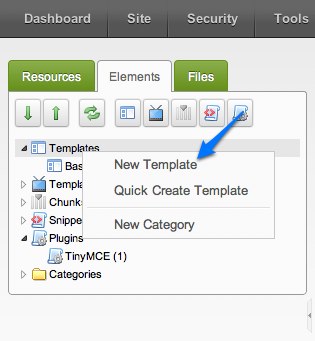
So let’s go ahead and build our template. To create a new MODx Revolution template, right click on Templates and then on New Template.
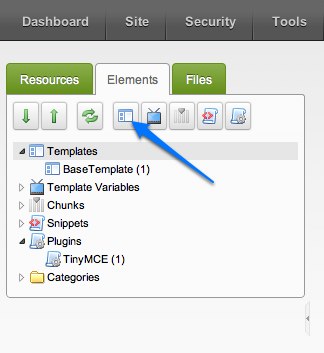
 You can also use click on New Template icon:
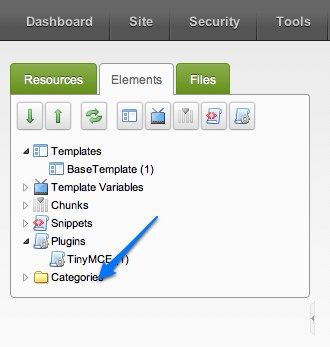
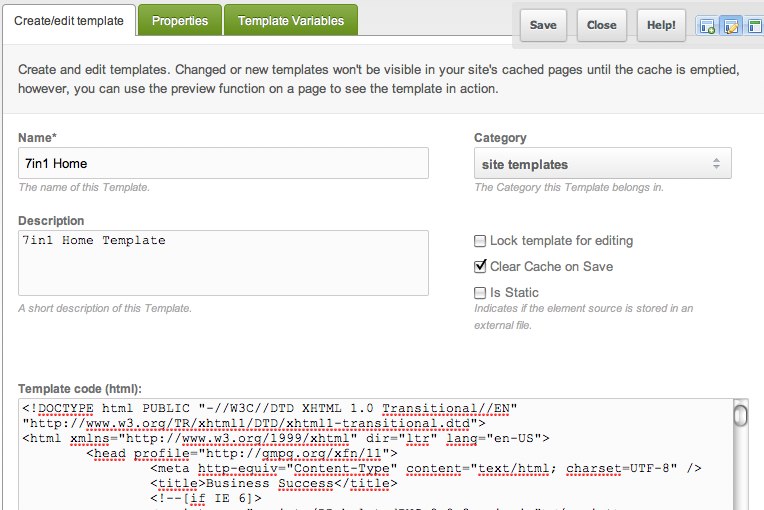
 In the new template screen, give your template a name and a description. You can place it in a category to keep things organized on your site. Again how you organize your site elements is entirely up to you. I usually have a main templates category where all the templates and chunks related to the templates sit, and then another for nav items, and so on. But you can organize it however you want. To create a category, just right-click on Categories in the Elements tab.
So now we’re ready to add the code to our new template. We’re going to start by creating the home page template. I can tell that the layout of this page is going to be very different from that of the inner pages, so we’ll give it it’s own template which I call 7in1 Home. The code for the home page is in the index.html file in the template folder we downloaded from Themeforest, so we open that file in a text editor and copy its contents into our newly created template in MODx. Before we copy it though, Note that you can do all your initial editing outside MODx and then port in the edited template, but for the purposes of this tutorial we will do all of our editing inside the MODx editor.
3. Edit the Paths
With the code in place, let’s start by editing all the paths. Recall that we placed our template assets in the assets/templates/7in1 folder. So we need to change all references to css files, js files, images, etc. to the correct location on our server. This, as you will immediately deduce, might be one of those things that are best accomplished before pasting your code in the MODx editor. So for example, just glancing at the code I can tell that I need to search for styles/ and replace it with assets/templates/7in1/styles/, and similarly replace scripts/ with assets/templates/7in1/scripts/, etc. So go ahead and do all the path replacements, and then save your template. You may find that after viewing the page you’ve missed some and you just need to go back and correct them.
4. Assign the Template
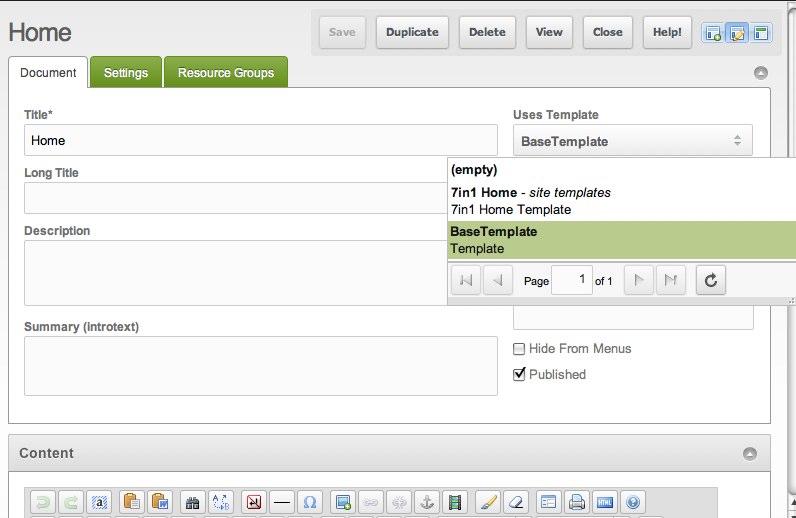
Now that we have the beginnings of the porting done, let’s assign this template to a page and see how we’re doing. To do this, we go to the Resource tab and open the resource we want to assign the template to (in this case Home). If you click on the field “Uses Template” you should be able to see and select the new template we just created.
Once you select the template, you’ll get a message asking to confirm that you want to change the template. The importance of this will become clear down the line as we build different templates as each template will have different chunks and template variables and will be laid out differently, so you want to be sure that you’re picking the correct template for the resource you’re editing.
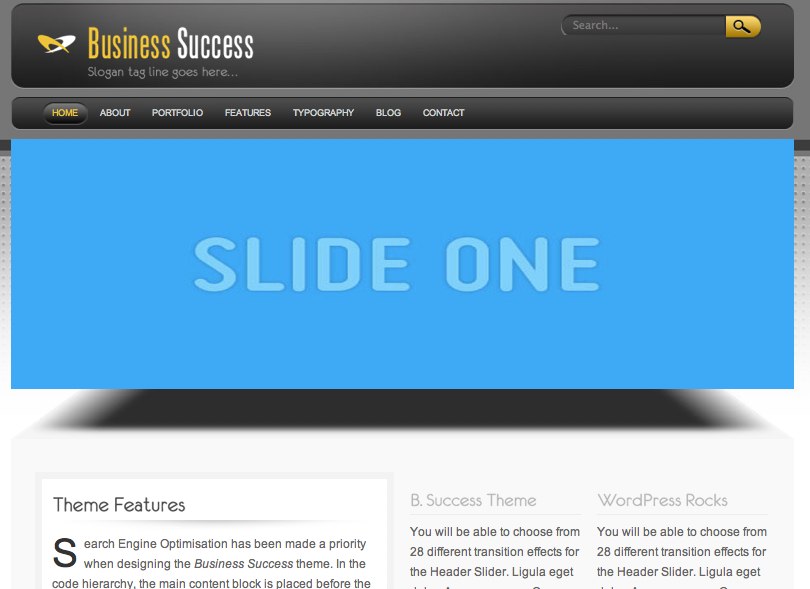
Once we click save, we can now preview the page and see what it looks like. Here’s a screenshot of just the top part of the page:
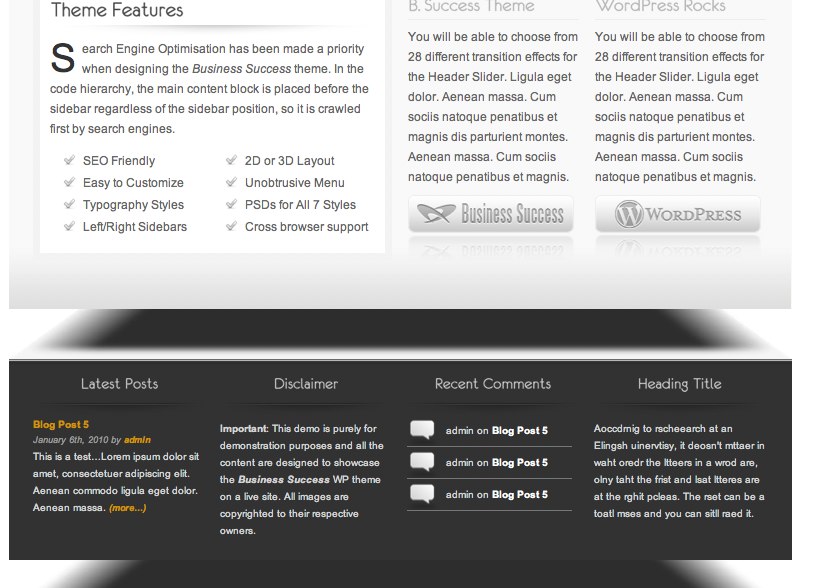
And here’s a shot of the bottom part:
As you can see, our site is starting to look like we want it to, with just replacing the paths so that the template sees our assets. However, the content, title tag, navigation items, etc are all still static, so the next step is to start inserting tags to begin making our template see the MODx stuff.
5. MODx Revolution Tag Syntax
To start working on making our MODx Revolution template dynamic, we need to work with MODx tags. MODx provides different tags that you can use to create and add variable content elements on your site. The full list of MODx Revolution tags is available in the documentation (see link at end of post). If you have used MODx Evolution before, you will understand the concept of tags, but you do need to check the documentation for the new syntax.
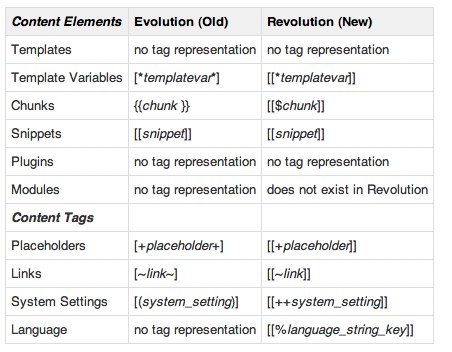 If you have never used MODx before, don’t worry, we are going to learn how to use these tags as we work through our site and by the end you should have a pretty solid grasp of what they are and when and how to use them. For now the table above is a nice reference from the documentation that you can refer to if you need a reminder of the syntax or of what tag is used for what content element.
In this installment we are mostly going to utilize the system settings tags.
6. Change the MODx Revolution Site Title
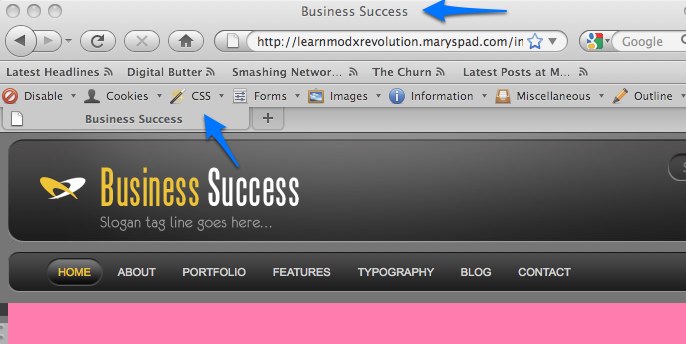
The first thing we want to do is to change the title tag of the site so that it reflects the name of our site, and not the name of the template as it is now:
To change this, we simply need to go to the title tag and replace the existing tag with a system tag. So looking at the <head> element of our template:
<head profile="http://gmpg.org/xfn/11">
<meta http-equiv="Content-Type" content="text/html; charset=UTF-8" />
<title>Business Success</title>
We simply need to replace the text Business Success in the title tag with the system setting tag that will parse the actual site title from our system settings. So go ahead and replace Business Success with [[++site_name]]. While we’re in there, we can change one more thing. The charset is also defined in our site’s system settings, so we can plop that in there too so that it’s parsed dynamically. So replace UTF-8 with [[++modx_charset]]. So the code section above will now look like this:
<head profile="http://gmpg.org/xfn/11">
<meta http-equiv="Content-Type" content="text/html; charset=[[++modx_charset]]" />
<title>[[++site_name]]</title>
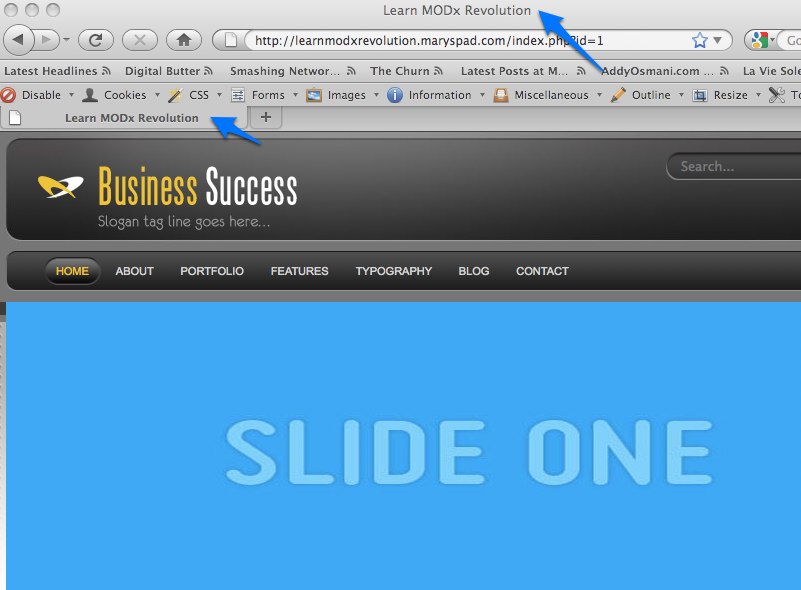
Save the template and preview the page, and you will now notice the change in the site title, that it now reflects our site name.
Additionally, if you view the code, you will see that the MODx parser has picked up on our site settings for the charset and inserted the correct charset dynamically. It just happens to be the same as what was on the template, but it’s being parsed dynamically and is not just a static value.
One very important thing that we need to add to the head element of our template is the <base> tag (see More Reading at the end of this post). We use the base tag to specify the default address for all links on the page. So in my case I could make the following change to the head element:
<head profile="http://gmpg.org/xfn/11">
<meta http-equiv="Content-Type" content="text/html; charset=[[++modx_charset]]" />
<base href="http://learnmodxrevolution.maryspad.com/" />
<title>[[++site_name]]</title>
This would be fine and would work, but again, instead of hard-coding the url in there like that, it’s better to make it dynamic and instead use a system setting tag. So then I make the following change to the code:
<head profile="http://gmpg.org/xfn/11">
<meta http-equiv="Content-Type" content="text/html; charset=[[++modx_charset]]" />
<base href="[[++site_url]]/" />
<title>[[++site_name]]</title>
If we now view source for the page, you can see that the MODx parser again is able to pick up and parse the correct url for the site:
Well, that’s it for now. We’ve made some good progress and now have the beginnings of a MODx template. We have seen an example of how to set things up, created a new template, added it to a category, and then started adding MODx Revolution tags to begin transforming our static template into a dynamic MODx template.
What’s Next?
In the next installment, we’re going to continue the process of making our template dynamic. We will talk about chunks, what they are, how to use them to simplify and organize our template, and more. So stay tuned, subscribe to the Coding Pad RSS feed, and let’s continue learning MODx Revolution
If you have any questions or corrections or just want to say hey, please feel free to drop me a note in the comments below. And remember to visit Themeforest to explore the selection of templates on offer.
More Reading
MODx Revolution Tag Syntax
MODx Revolution Commonly Used Tags
HTML <base> Tag
Go to Part 5: Working with MODX Revolution Chunks


Hi and thanks for this great Tutorial. I would like to see a detailed tutorial on the form customization. It’s nearly impossible for me (a Designer) to do the same like we did with the ManagerManager-Plugin in Evo. It’s the only reason why I stay with Evo.
Greetings from Germany!
Achim
Thanks for your feedback and for the suggestion. I’ll add that to my list.
mary
I agree. Form Customization is tough to learn without any good tutorials. I’d love to see something on this.
Thanks for all your great work and contribution to MODX, the best CMS out there.
Crawford
As usual, a great tutorial.
Hi Mary, after being distracted by so many CMS, I’m hoping to buckle down and port this free news magazine theme to MODx:
http://www.os-templates.com/free-css-templates/4
The only thing they require is leaving in a footer link.
Great timing, I’ve been trying to decide Revo or Evo? It seems there are always distractions to coding, which CMS which version yada yada.
Hey thanks alot!
Crssp,
You’re welcome! Buckle up and enjoy the ride 🙂
mary
Great tutorial! Can’t wait for more.
@Crssp: I ported, and tweaked, School Education and Internet Business for ModX. Really easy once you get the hang of it.
You can see the Os-Templates in action at these sites:
http://www.camiguinguide.com
http://www.myesl.info
Great to see some more content here Mary!
Any plans on covering Revo Gallery or other options for creating custom image/sideshow presentation? It seems Evo has more options/flexibility/ease of use etc…
Max
I do eventually plan to cover most of the addons, so stay tuned 🙂
mary
Mary, you are a god-send!!
Thank you so much for your time and effort with these evo tutorials. Is there any chance you will be continuing them? And if not, would it be worth while to just watch the revo ones, even though im using evo?
oh my god, sorry to double post here, but i got evo and revo mixed around in my previous post – what a newb!
The question is if I can watch the evo screencasts even though i’m using revo. thanks
alan,
thanks for the feedback. I am steadily building up the Revo series, although time is always an issue. I think it’s worth watching the Evo screencasts as long as you understand the tag differences and manager interface parallels with Evo, but I AM working on a series of Revo screencasts and will hopefully start posting them in the next week or so, time permitting.
thanks for visiting the Coding Pad!
mary
Hi
I’m trying to put in place a horizontal menu, oddly I have no trouble doing so in evolution, but revolution is killing me. I just cannot seem to get it working.
I’d like to suggest that you do a screencast of creating and installing a horizontal menu system for revolution as there is none on the web (there is a nice user manual for wayfinder from evolution and there is muddy dogpaw (awesome but lacking in basic educational communication and howtos’)).
I’ve asked you questions in the past and found your replies comprehensive and communicative in a “I speak the language of mortals sort of way” so hope that you might conisder it…
regards
Lawrence
Mary,
Many thanks for restarting the series. Well worth the wait
Regards, David
Maybe it`s better to use [[*pagetitle]] instead of [[++site_name]] ?
in
you say to “change the title tag of the site to [[++site_name]] so that it reflects the name of our site, and not the name of the template.”
i’m confused, because my modx does display the site name in the title bar (followed by the template name), without putting [[++site_name]] into the template.
please explain. thanks!
(i forgot to click “notify me of followup comments”, thats why i posted twice, sorry)
what code is in your title tag in the template?
[[++site_name]] – [[*pagetitle]]
i’m using the BaseTemplate that comes with Revolution.
It also contains the base below, which you say i need to add:
but, strangely the BaseTemplate does NOT include the following:
It just contains a simple tag.
The Revo base template that comes with the Revo install already has those title tags in place. In my tutorial, I am working from a static HTML/CSS template, hence I need to replace the static bits in the title tag with the dynamic MODx tags.
This may be dumb, but Ima noobie.
In part 1, How do you upload whole folders?
Thank you…Great stuff so far
Jeffrey
Depends on what your setup is. I usually zip up the folder, upload it, and then extract it on the server, that way I don’t have to upload one file at a time. It’s faster and uses up less bandwidth, but your server needs to be able to support unzipping archives.
mary
Thanks, Mary.
I was able to upload a zipped file, but am not sure how to extract it. I am using MAMP as my server.
Jeff
Jeffrey,
If you’re using MAMP I assume you’re working locally, on your computer? If yes then it should just be a matter of moving the folder over using Finder. If you’re working on a remote host, see Crrsp’s response below.
HTH
mary
Yes, local host. Thanks again!
Jeff
I’m banging my head b/c it is probably something silly, but I cannot move a folder simply using Finder.
I am dragging and dropping, is that wrong?
I am working locally on my computer.
Confused,
Jeff
Jeff
Should be the same process as moving any files, what troubles are you having with it? What is happening vs. what are you expecting?
mary
Nothing happens. Nothing moves.
If you have hosting with a control panel, when you use the file directory, and add a file, by uploading a zip box… there will be a check box whether you want the file to be extracted.
You’ll want the zip folder to have it’s contents contained in one folder at the root of the zip file, if you don’t want all those files distributed to the current level, where you uploaded the files.
alternatively you could create a directory, then upload the zip and have it extracted into the directory you created.
You rock mary,thanks a lot!
A minor point. When you add the , I think you should remove the slash immediately preceeding the double quotes, otherwise your view source shows the site address with // at the end (which your example does not, so I guess you picked it up).
btw great tutorial series
oops, forgot I included html tags. In the above comment, between ‘add the ‘ and the comma, please insert:
still no joy, I see. Try:
<base href=”[[++site_url]]/” />
Hello Mary! I’m from Russia and i love your blog! In Russia we haven’t many information about Revo, only Evo and your blog help me to learn this CMF. Thank you for your work Mary! Good luck in the next articles about Revo
Thank you! It’s very good “how-to”.
Hello Mary,
While trying to install a package I downloaded following your procedure in the Revo tutorial. I got this error:
“/*
* MODX Console Output
*
* @date 2011-12-15 11:36:37
*/
Attempting to install package with signature: tinymce-4.3.0-pl
Package found…now preparing to install.
xPDOZip: Error opening archive at C:/xampp/htdocs/sites/LearnModxRevo/core/packages/tinymce-4.3.0-pl.transport.zip
PHP warning: ZipArchive::extractTo() [ziparchive.extractto]: Invalid or unitialized Zip object
PHP warning: ZipArchive::close() [ziparchive.close]: Invalid or unitialized Zip object
Could not unpack package C:/xampp/htdocs/sites/LearnModxRevo/core/packages/tinymce-4.3.0-pl.transport.zip to C:/xampp/htdocs/sites/LearnModxRevo/core/packages/. SIG: tinymce-4.3.0-pl
Could not install package with signature: tinymce-4.3.0-pl
/* EOF */
”
system was not able to unpack the package.
ojchris
I presume you’re referring to the manual download method? The error means you may have a corrupted download. I would attempt to redownload, and make sure you’re downloading the correct version.
Hope this helps
mary
Hi Mary,
I have a question about these “dynamicizing” MODx tags: I understand how certain things are better made dynamic (like navbars and content etc) but why would you make the site title or charset or base URL dynamic?
The way I understand it, static content loads faster because dynamic content creates more server requests. So if I’m not planning on changing things like the base URL, then wouldn’t it be better to leave them static?
Adi
Making site title and charset or base url dynamic comes in really handy if somewhere down the line you change hosts, or change something in your site configuration, or decide you want to use a different title for your site, or your internationalize your site and find you need to use a different charset, etc. Then it’s really handy to have all these settings in just one place instead of changing it on every template or chunk or whatever. It’s just good practice to separate settings from the site, and it makes site maintenance a whole lot easier. You can leave them static if you want, no problem, it’s also a matter of preference. But I personally think it makes things cleaner and easier to make them dynamic.
mary
Thanks for all of your tutorials this one especially it finally has gotten me started. At the end of it you say (In the next installment, we’re going to continue the process of making our template dynamic) but how do I find the next installment and how many tutorials are there?
Rocky, if you click on the Beginner Tutorials link on the top navigation of the website you’ll find a list of all the tutorials in this series,
mary
Well I now have 2 sites running on Bluehost, 1 to go. I guess the long and short of it is: sometimes the install works on Bluehost, sometimes it doesn’t.
Mary, thank you so much for a great tutorial.
A couple of things that I noticed in this lesson:
1) when I switched the ‘Home’ page template from the BaseTemplate to the CustomTemplate, and then tried to preview it, the preview did not update – because MODX was using the cached version of the page. In my setup, after changing the page’s template, in order to see the changes I have to ‘Clear Cache’ for the site, first. It may be worthwhile mentioning this in the tutorial, so other newbies like me don’t feel too lost, if they come across the same problem.
2) The “++site_url” tag seems to be a “system setting” – I’m guessing this because of the “++” on the tag. Nevertheless, when I search the System Settings list, it is not listed anywhere… Confusing… Does that mean that there are ‘hidden’ settings that are set automatically? If so, how do we find out what they are?
Once again, many thanks for such an easy-to-follow guide. Please, keep up the good work, it’s appreciated!
Experimental site only – for modx.
I just installed the sample site.
How do I proceed to build with you tutorial? Do I have to wipe that out?
Thanks
Bob Batson
Bob
I actually have not used or explored the MODX Revolution sample site. In these tutorials I do start from complete blank slate so if you want to follow them step by step you would need to only have a clean installation with no sample site.
You could do two parallel installs since it’s only experimental, one with the sample site so that as you learn the different parts you can go in and see and understand how the sample site was built, and one blank one for these tutorials.
Hope this helps
mary
since the 7in1 business template is now no longer available on themeforest, I went looking for a similar theme to follow along with. Here’s a free one I found which is very similar – http://www.csstemplatesfree.org/smart-biz.html
Thanks Isaac. I will take a look at that theme. I plan to update this series soon and will probably pick a different theme, one that I can attach to the series and that will remain available and not disappear 🙂
Since the template I used for the tutorial is no longer available for purchase I have provided it for download so you can still follow along with the tutorial
hi mary, your tutorial is great!
do you plan to update it in the next time?
greetings from vienna 🙂
Was working thru your tutorial on templates. Using Modx Revolution v 2.5.7. I dowloaded the 7in1 template you linked to: it’s quite complex. I extracted it and then made a Zip archive with it’s 3 directories that you’ve shown + the 10 or so files.
However, using the Modx Rev manager I can upload the file but I cannot extract from a zip. I guess I need to execute some sort of terminal command to do this on my site? I put it in /assets/templates/7in1/
I can also recreate the directory structure and upload all the files without the need for a .zip but that’s very tedious.
Last year I hired a developer to work on my site. They did install the Modx but little else. While I can pay for some support I don’t want to spends thousands of $ and not get anything working.
Hi Julius,
I don’t believe you can unzip from the MODX file manager. Instead, you probably want to do this from your hosting account’s file manager, for example if your hosting account is on a cPanel platform you can log into cPanel and use the unzip utility in the file manager. If you have SSH access to your site that’s another way to do it – log into your site using SSH and then navigate to where your zip file is and unzip it. Uploading the files individually is very tedious and time consuming, I agree. Try one of the methods i have outlined and don’t hesitate to reach out if you have further issues.
Actually I hadn’t even thought of that. I’m used to using FileZilla for SFTP and was able to upload the 3 directories & the files for the 7in1. I stuck it in assets. My developer uploaded a WordPress template {bought thru my Envatio account} months ago so there are template files all over the place but I have no indication that that one works.
An update, Surprisingly enough it worked !!! However this template with the modern rounded buttons isn’t the effect I’m looking for. This is the 1st time I’ve ever used a template for anything. Now I just need to figure out how to get the target look.
It would be perhaps easier to edit in an outside editor with global search & replace tho…
Thanks very much for the tutorials- they really are extremely helpful: even up to Rev 2.5.7-pl. If I could edit my comments I could cut out unnecessary stuff.
Glad it’s working! Regarding being able to edit with an outside editor, there are options. There are code editors that include FTP/SFTP ability so that you can edit a remote file locally on your code editor and when you save it syncs and uploads to your server. A few that come to mind are Sublime Text (with the SFTP plugin installed), Atom (with an FTP plugin installed), Coda (on Mac), Aptana IDE on both Windows and OS X, etc. A google search should bring up some alternatives for you depending on what OS you’re using. Hope this is helpful.